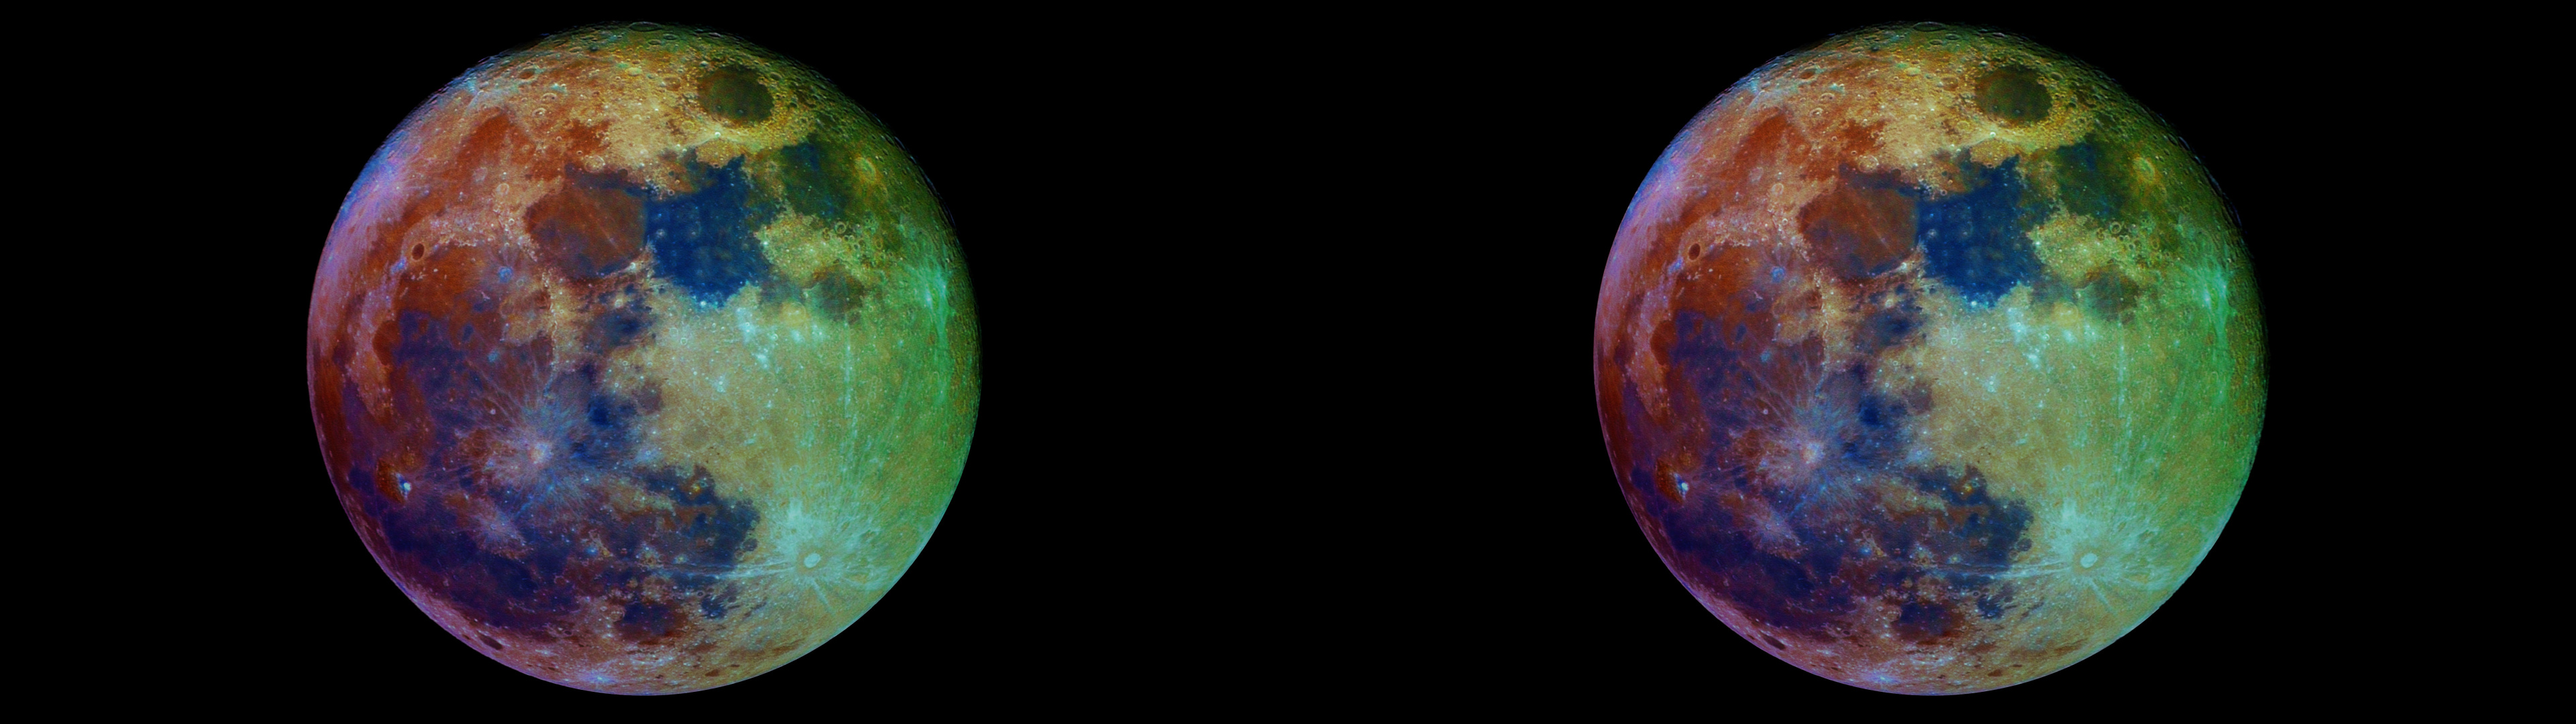
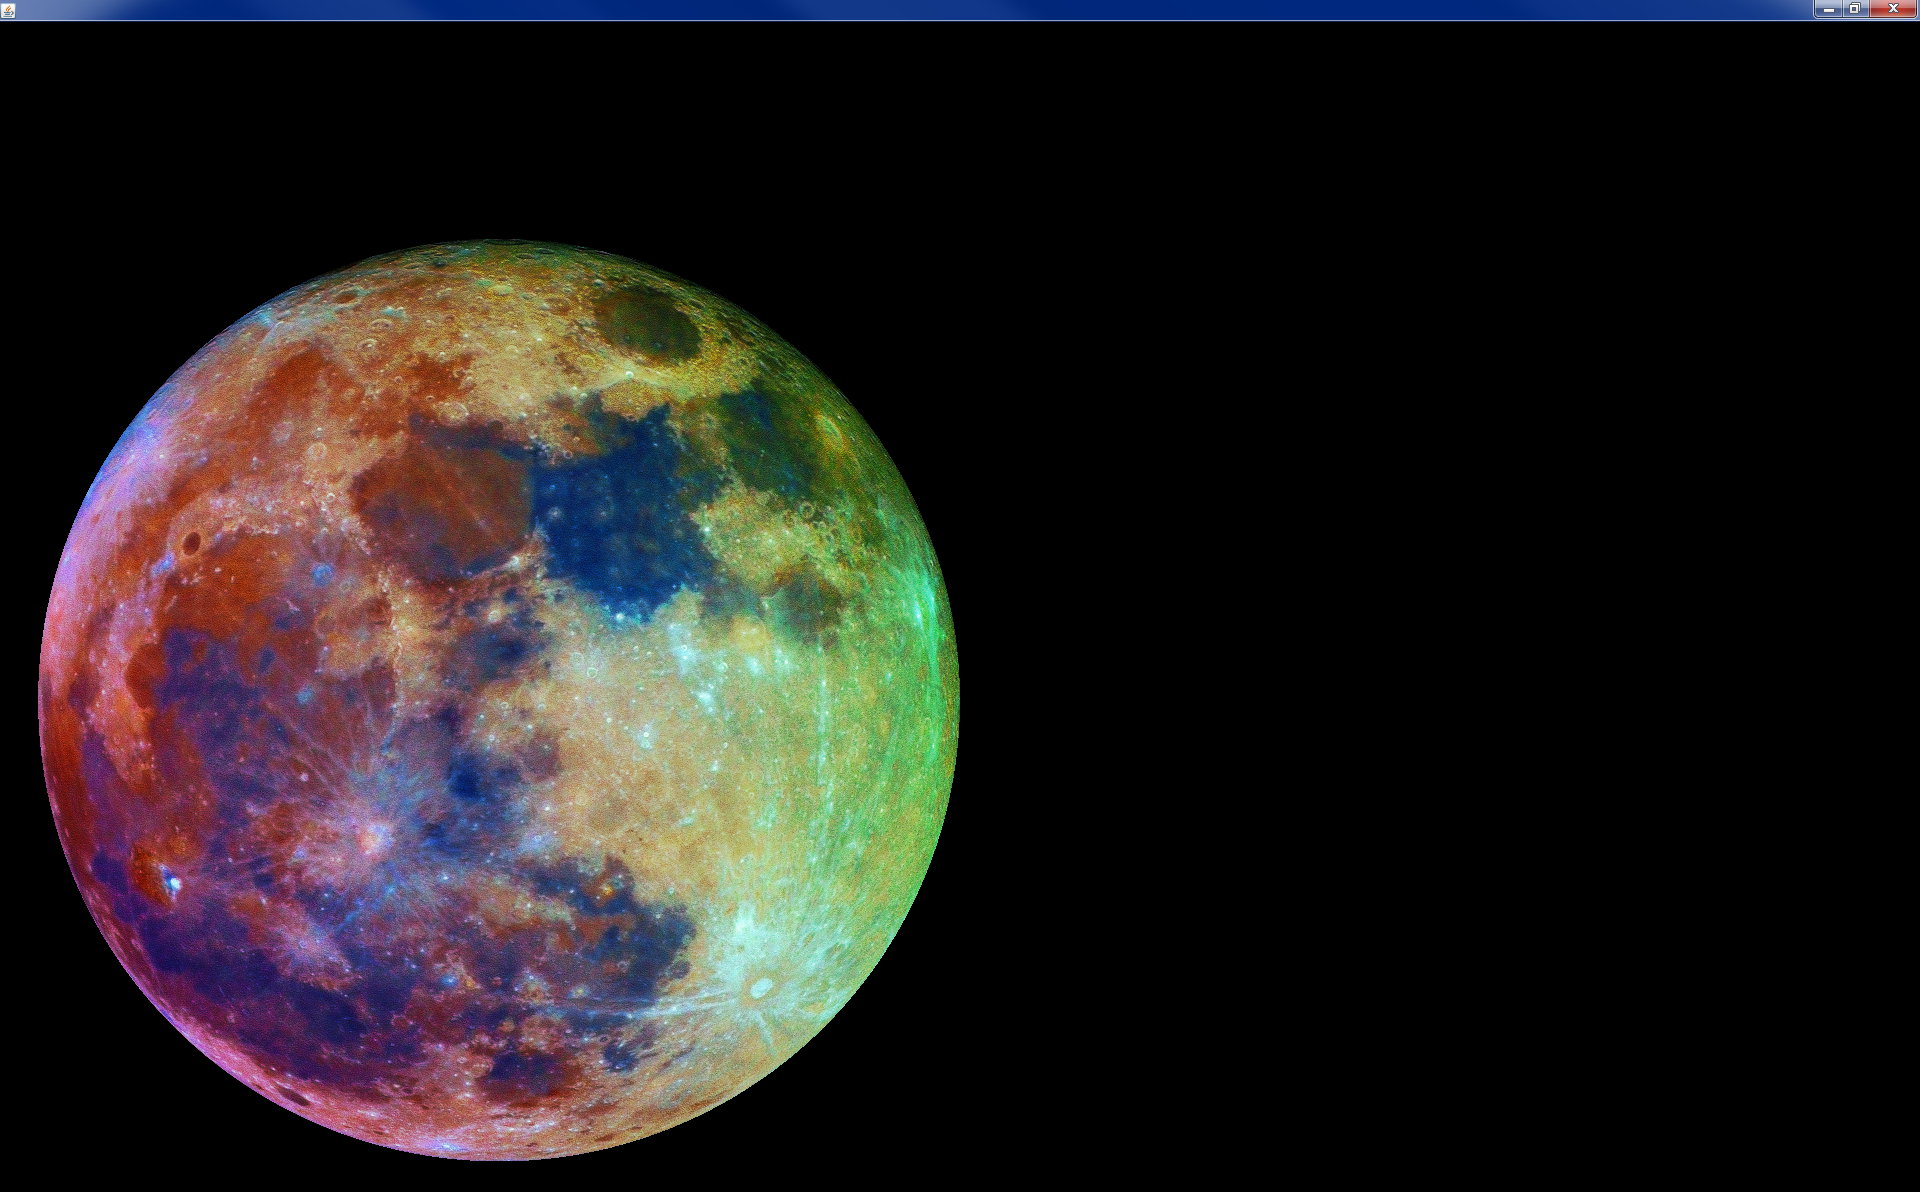
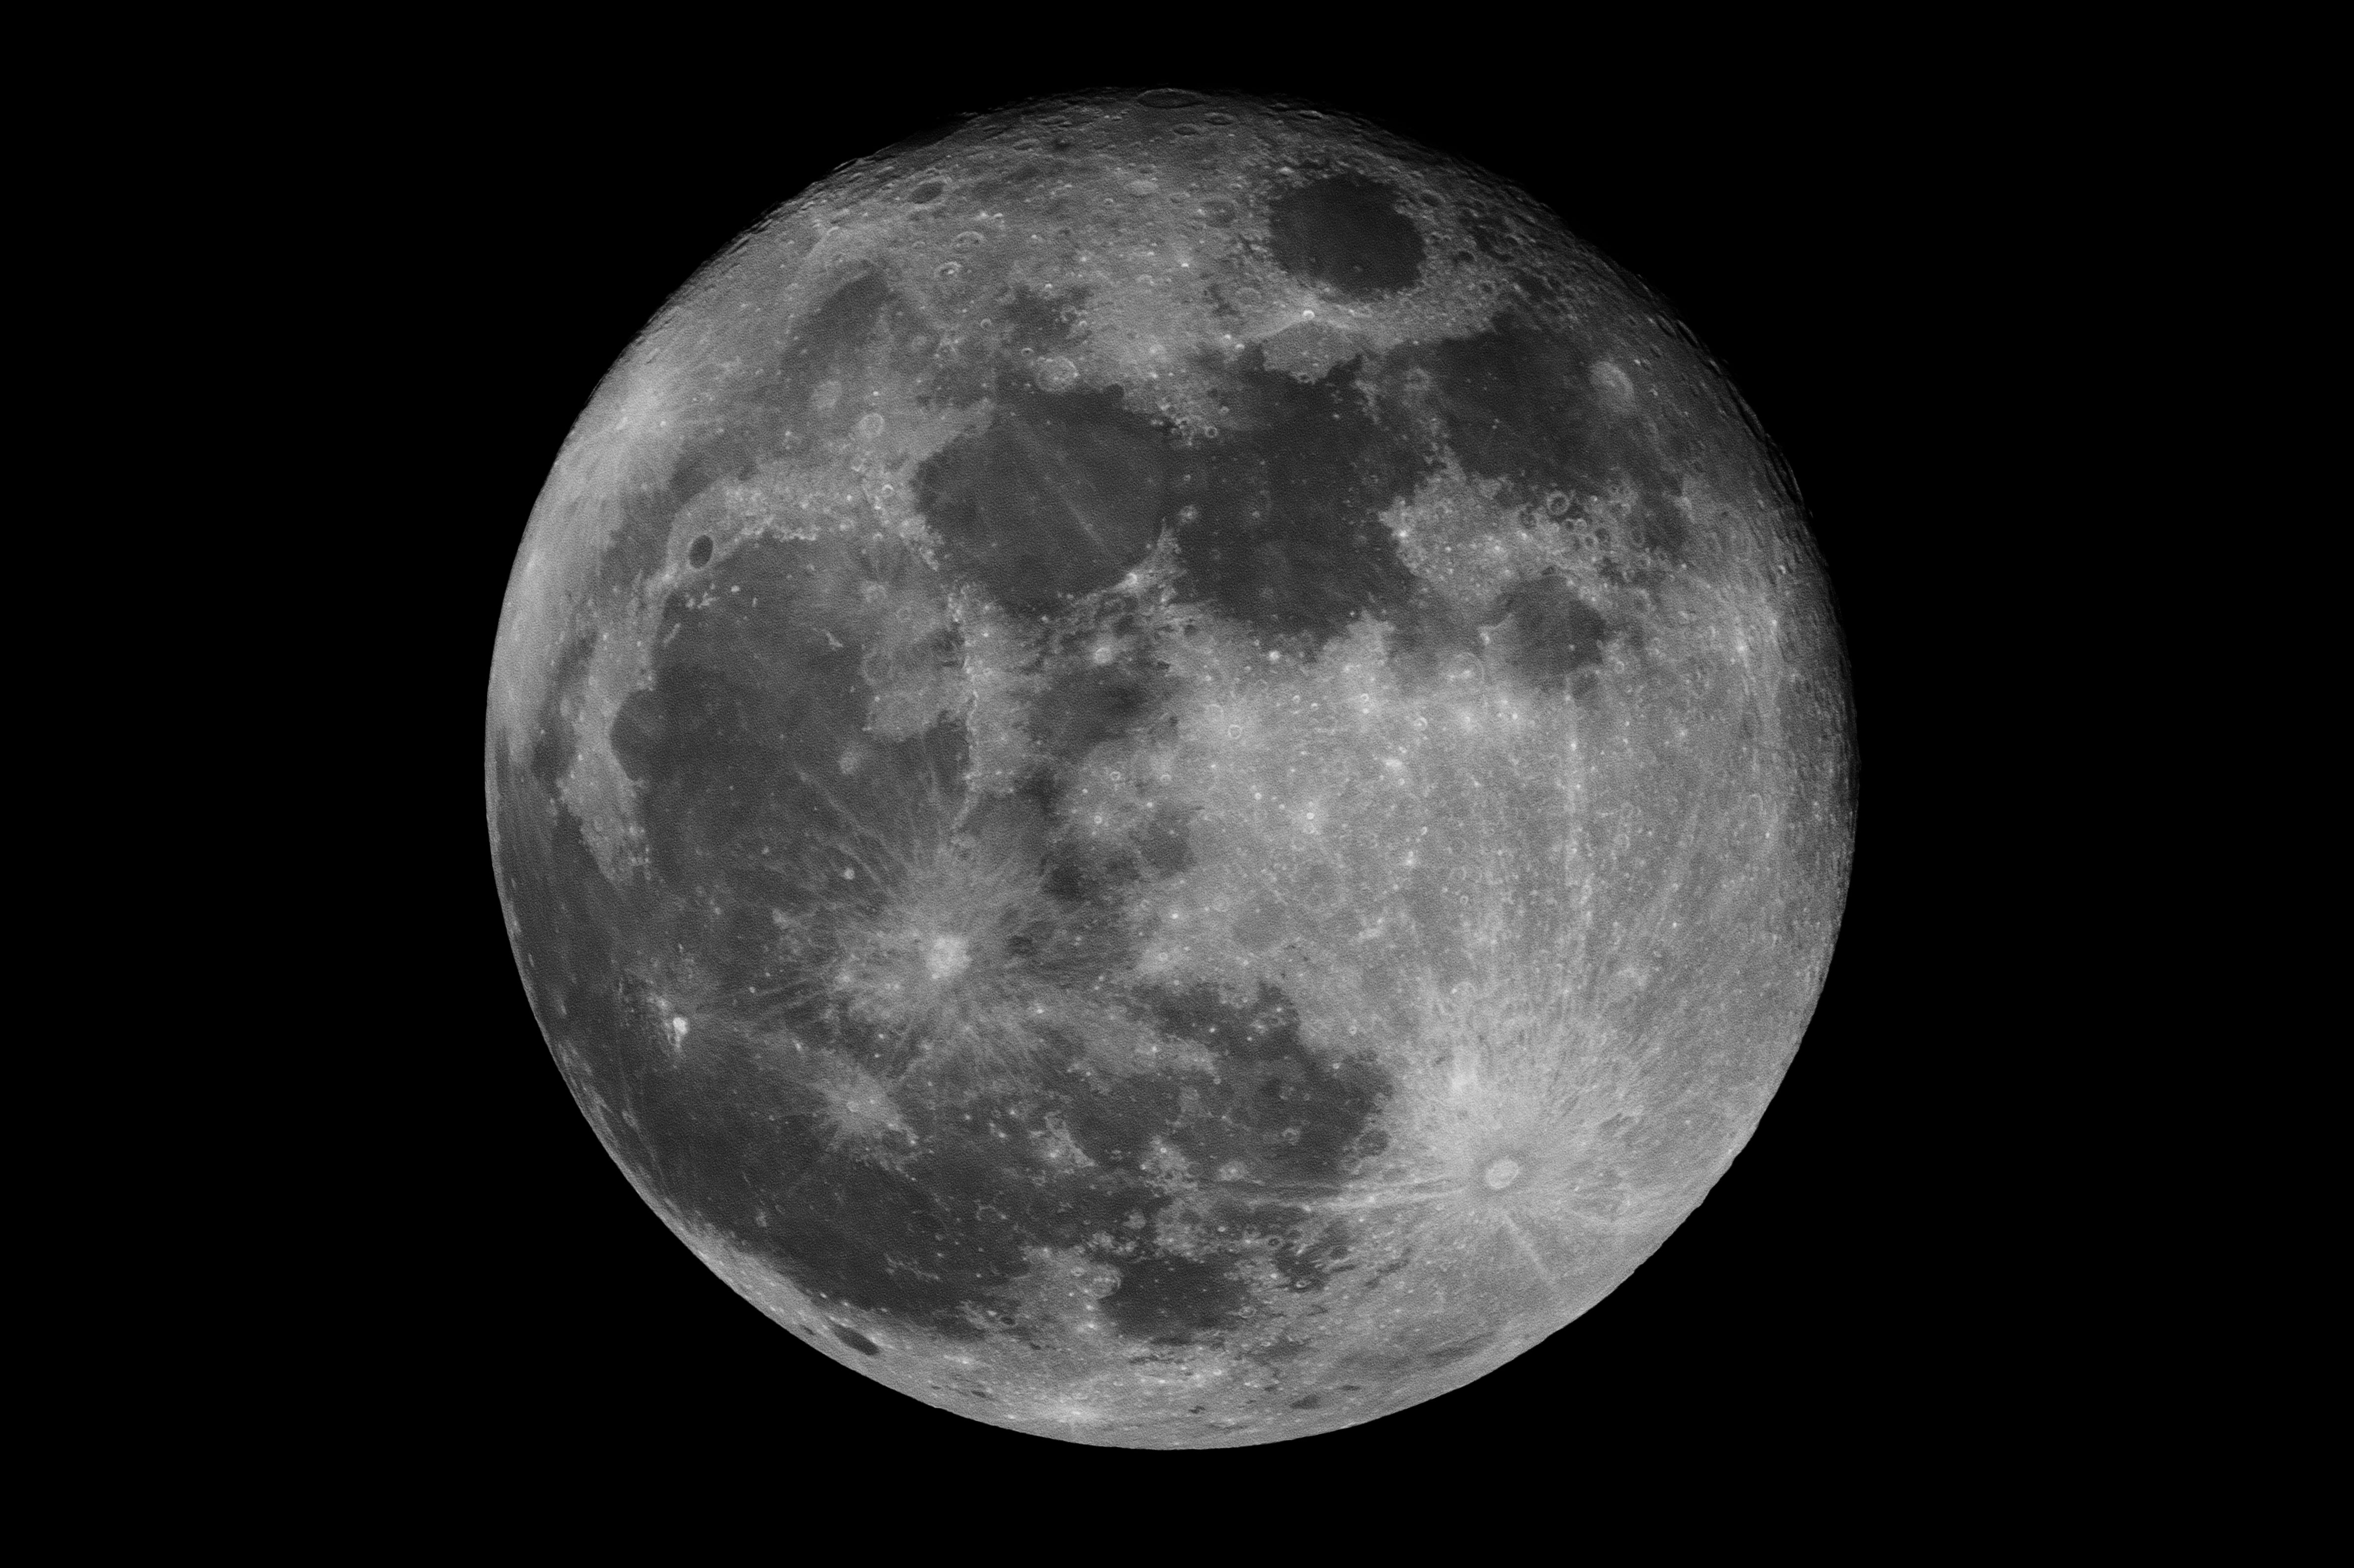
The Moon in color and natural tones floating
in mid air !
3D processed for up to UHD size !
NEW LINKS !! Enhanced colors Full
Moon Link for demi
width JPG for UHD 3D TV For non UHD TVs ( 3D HD) : Link for demi
width JPG for HD 3D For ANDROID
UHD TVs (Like Sony)
Natural tones
Full Moon Link for UHD
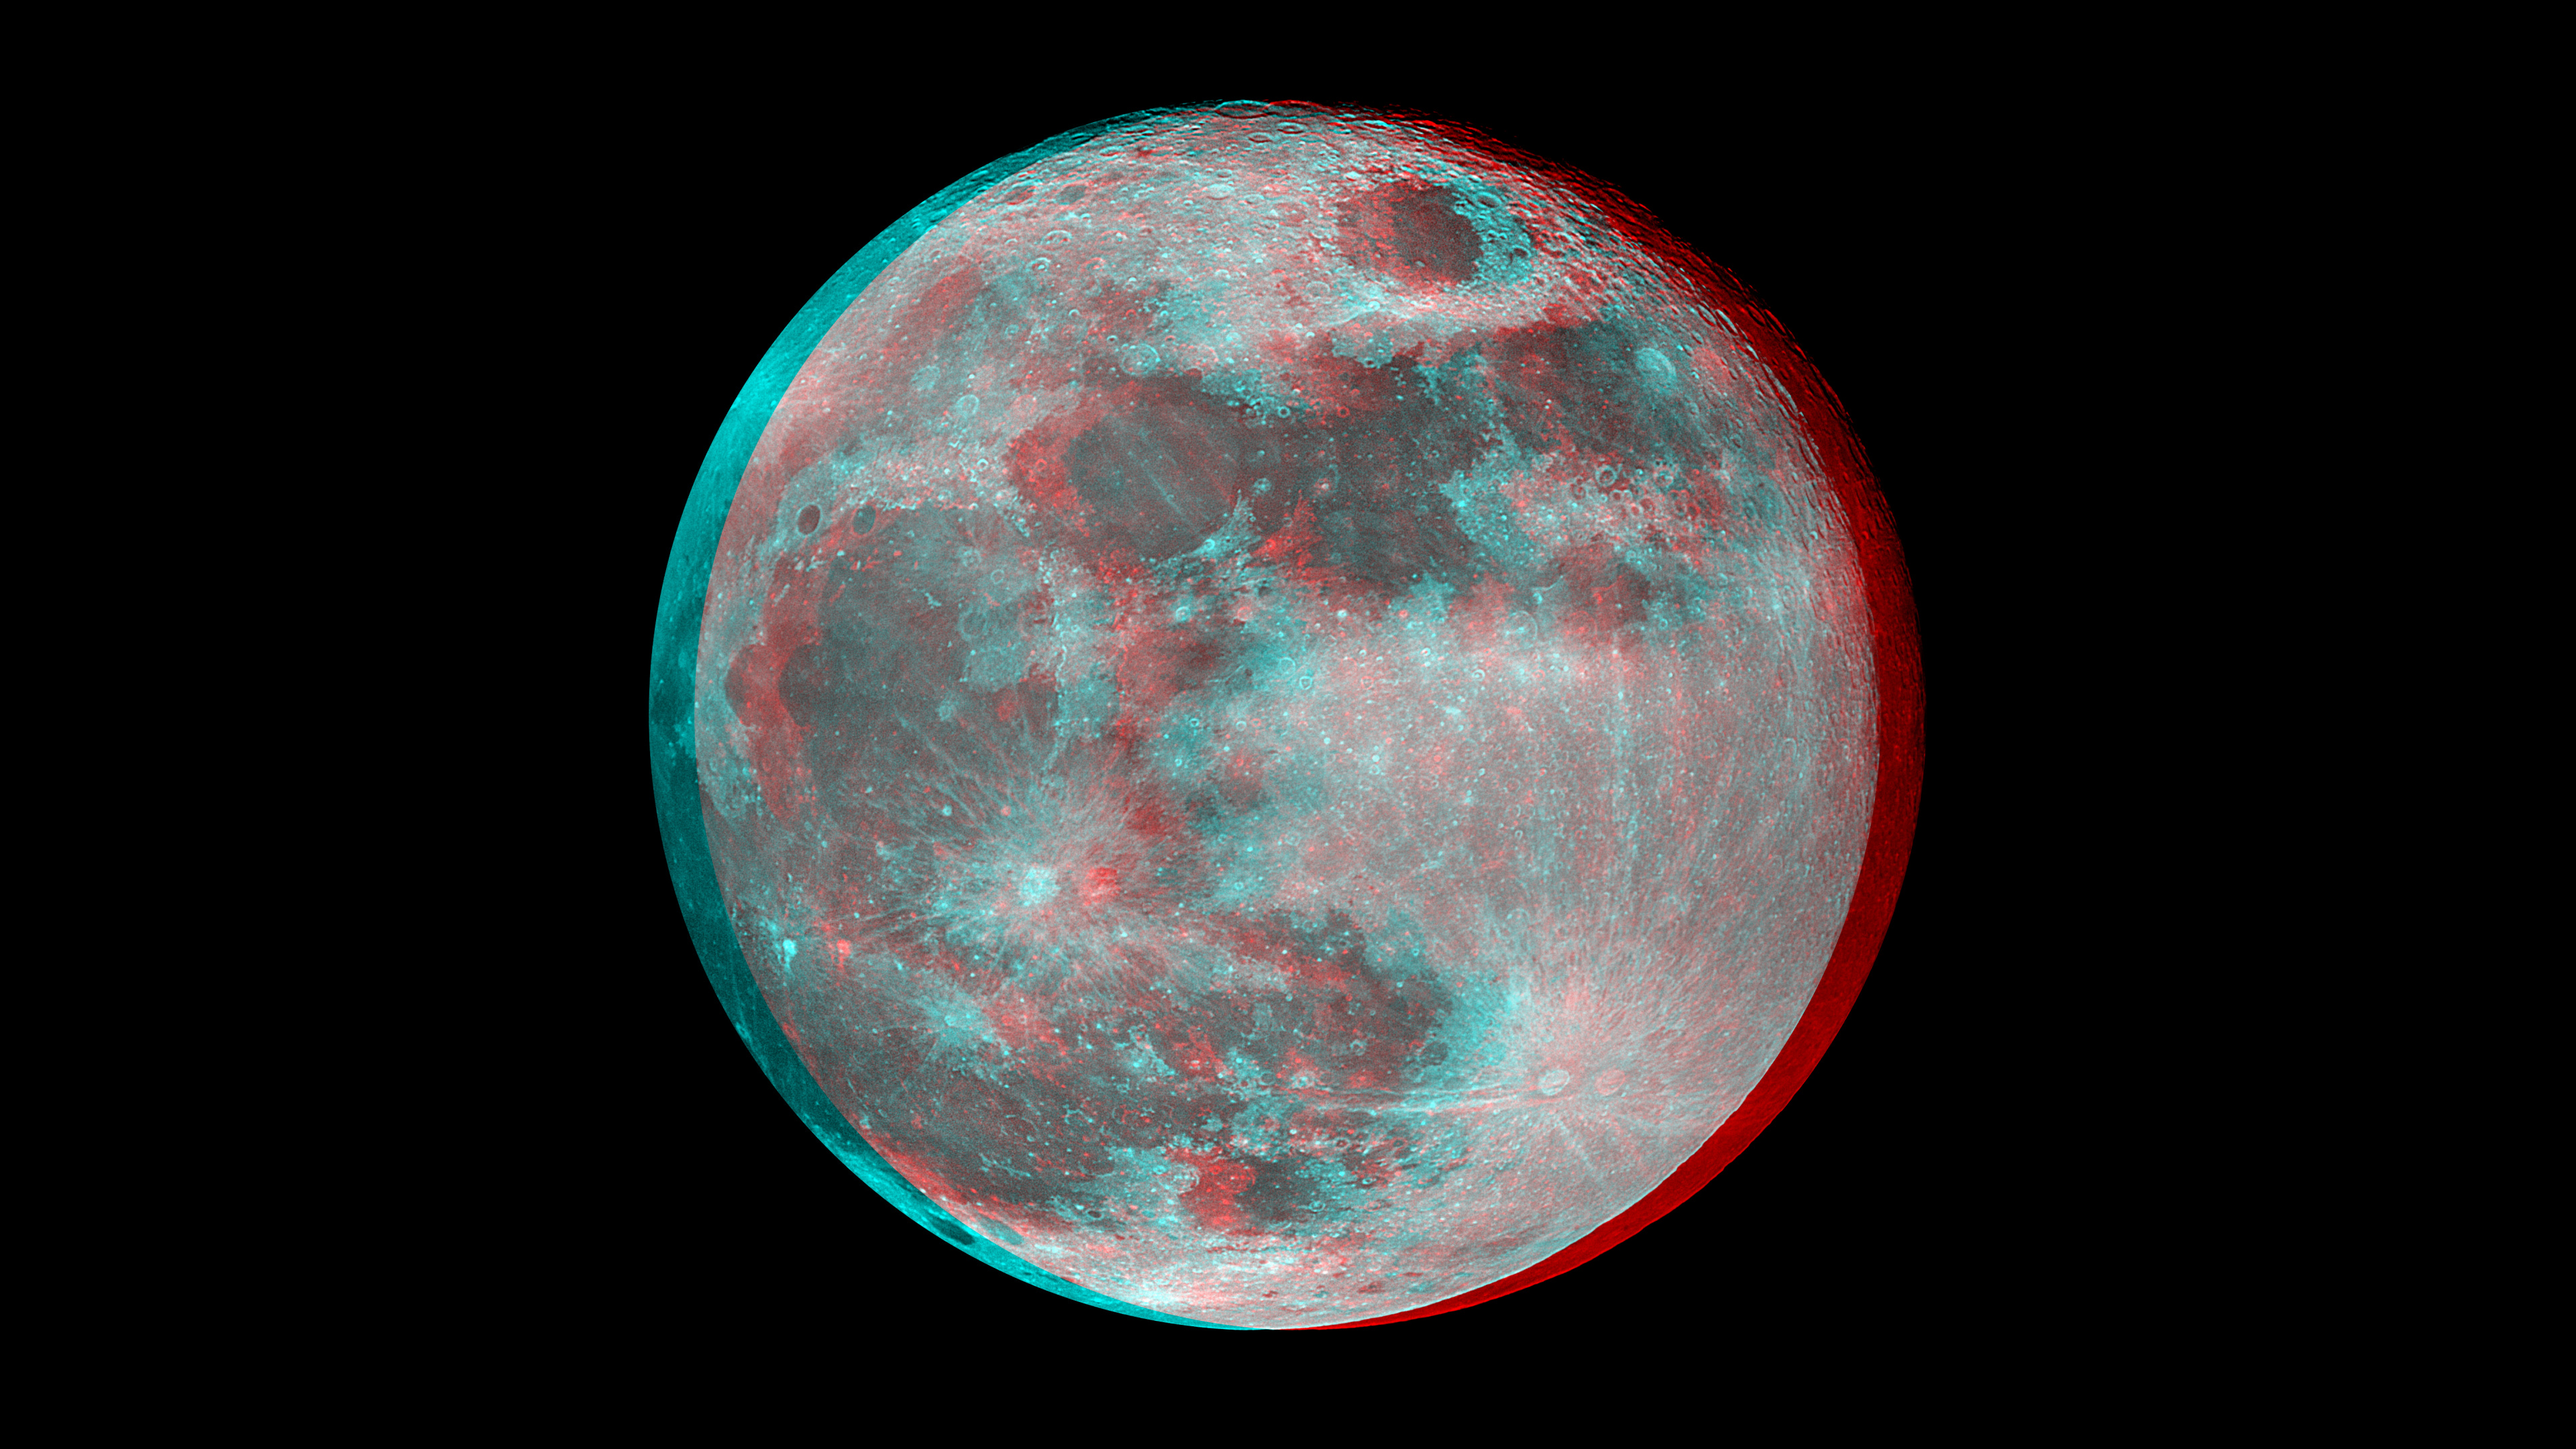
.MPO, best for UHD 3D TV Link for standard UHD TV (Anaglyph glasses Red/Cyan) For non UHD TVs ( 3D HD) : Link for UHD
.MPO, best for HD 3D Link for standard HD TV (Anaglyph glasses Red/Cyan)
|
---------------------------------------------------------------------------------
Older links left in case ...
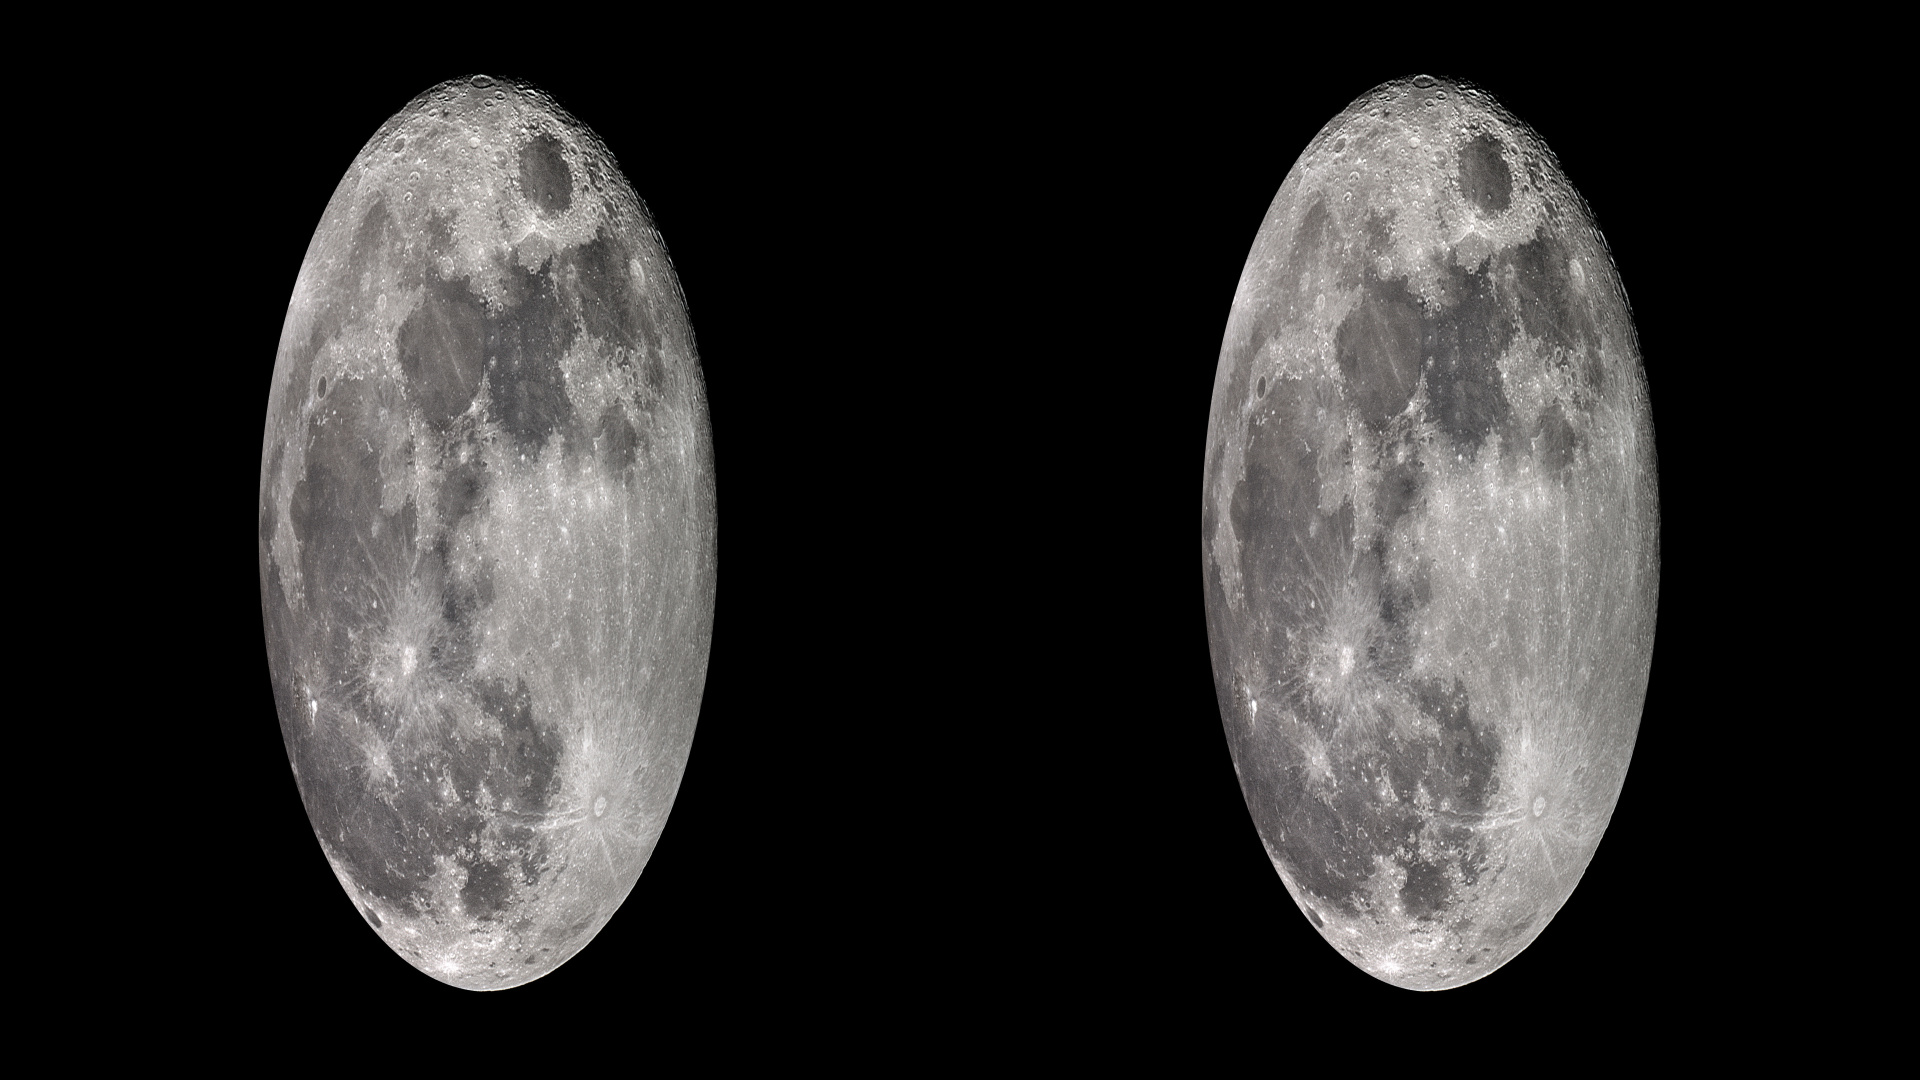
Download thoses 3D pictures (parallel mode) with a right-click ...
on couple on top for 3D HD (2 x 1920
x 1080)
or on 3D
- UHD [.JPG] (2 x 3840
x 2160)
or on 3D - UHD
[.MPO] (easily loaded by a LG, Panasonic, ... UHD 3D
TV)... then choose "Save link as ...".
Thereafter, a USB
key is the easiest way to go to the TV !
With a 55" 3D TV it is giant ! I wanted to get
this huge Moon balloon in my hands :)
Changing the type of vision to X, interlaced
... can be done easily with SPM (StereoPhoto Maker). Don't use anaglyphs
!
---------------------------------------------------------------------------------
This page will explain how it was done using a battery of freewares !
I] Taking pictures !
A good option with a not full frame DSLR
as the Canon EOS 40D, 500D, 1100D, 1200D etc. is using an ETX90 well known
for its almost perfect optics.
The Moon will almost fill
up all the FOV (in the smallest side of the sensor) but there is enough
margin to work even without motors.
It
is even
light
enough
not
to be obliged to install counterweights
on a small Celestron of Vixen SP style mount (if using manual controls).
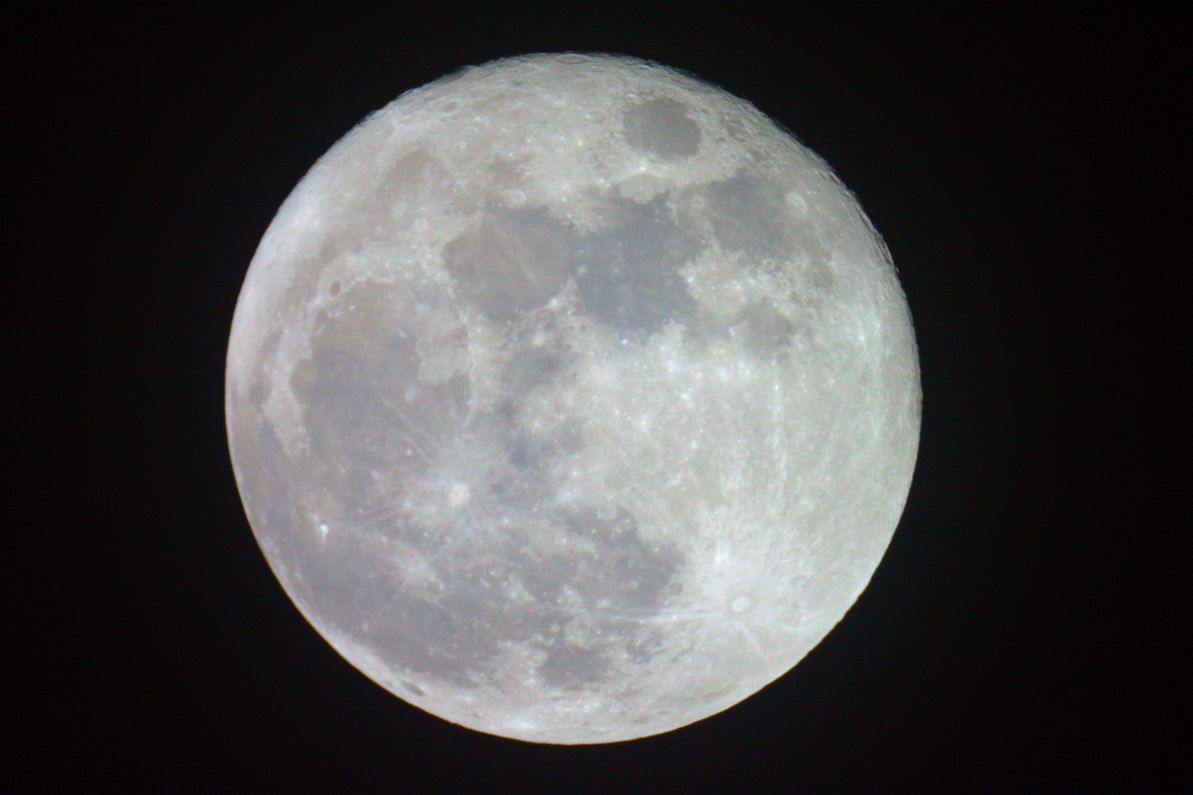
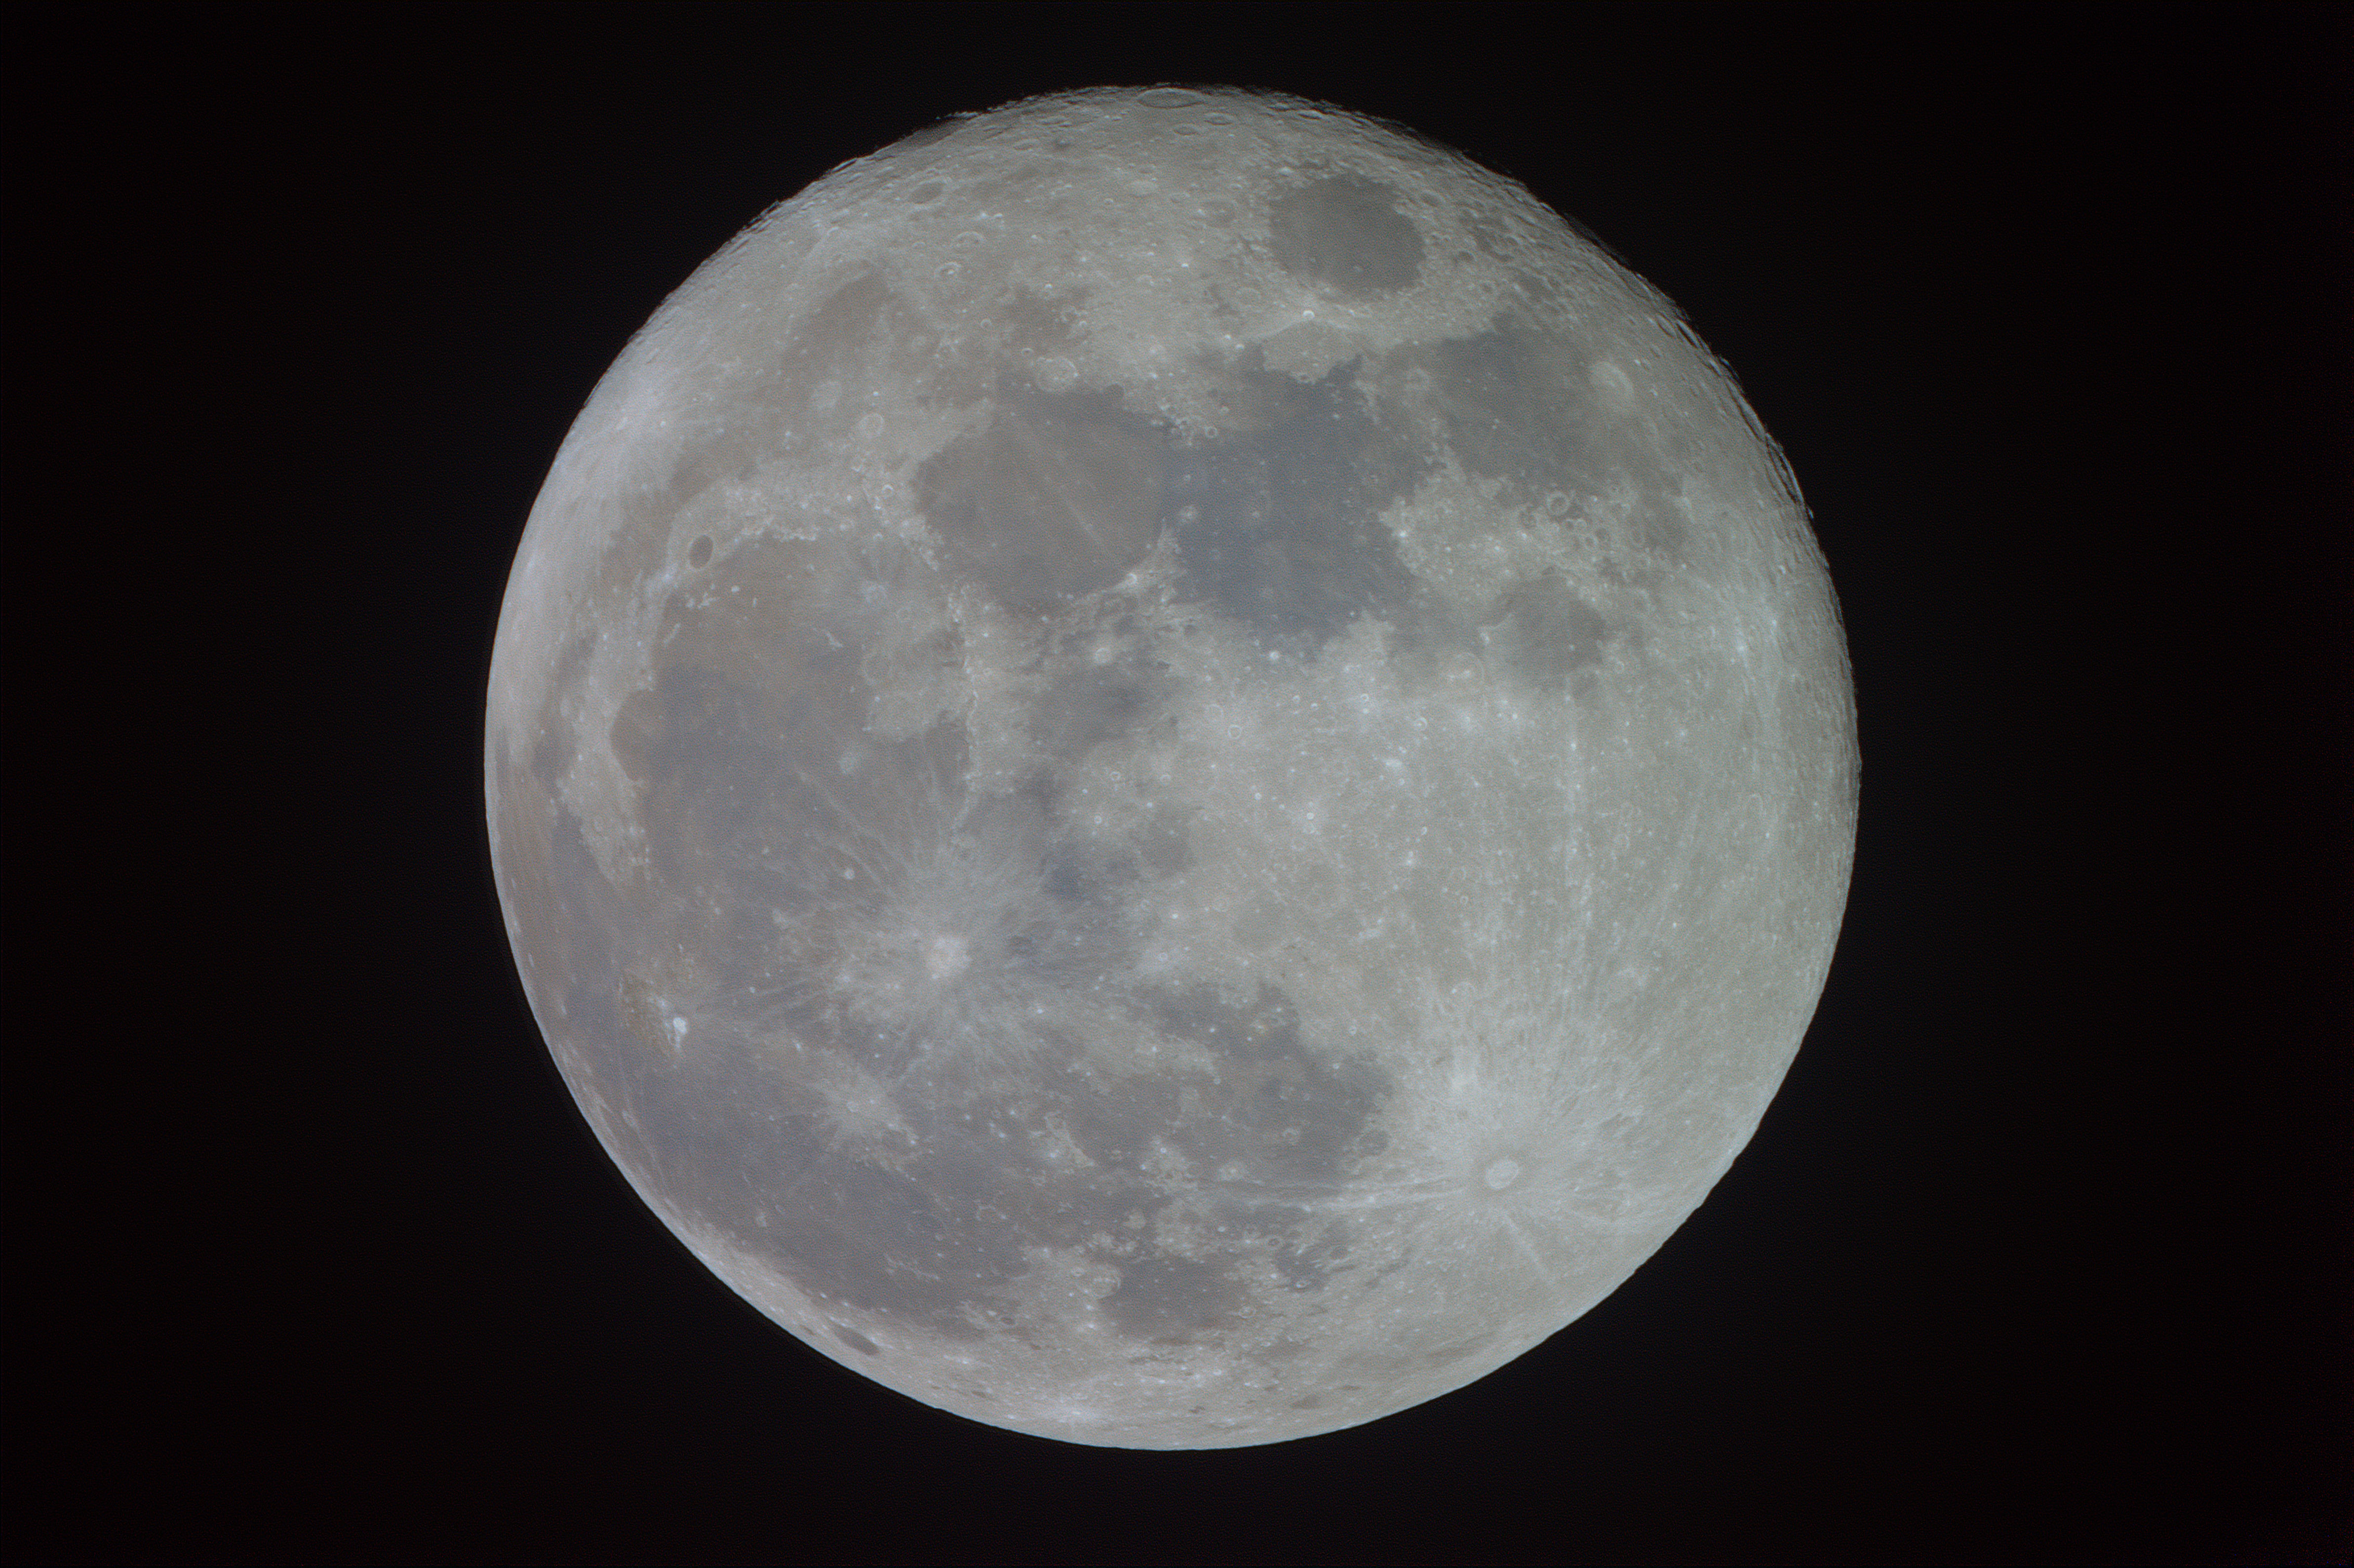
Below is a typical example of the field and the interesting Exif data of
the exposures.
Generally clic on the pictures for full original size.
 |
Filename - _MG_4599.JPG |
I took in a fex min 26 pictures in RAW + JPG_L mode.
Why take so many pictures ?
It has been shown than increasing the saturation of a single picture would
lead fast to bad looking color noise (less with RAWs as below with Irfanview
than using JPGs but still ...) !
Then a registration software should be used to increase the S/N ratio
...
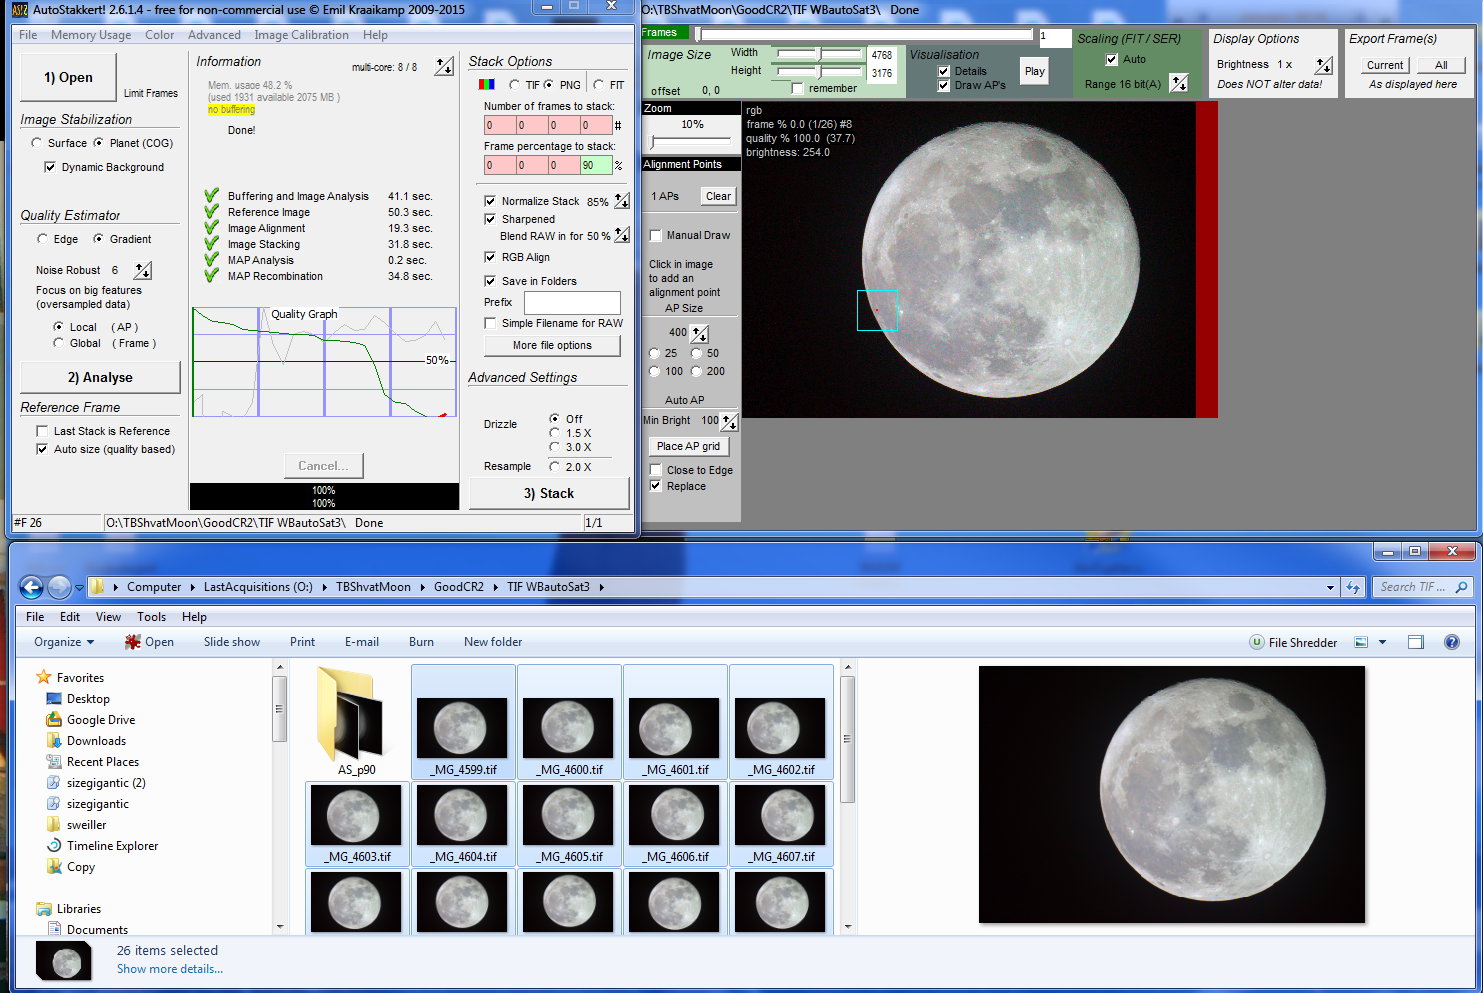
II] Registration to improve S/N ratio
The best free registration software available
today for large planet like objects, IMHO is AS!2 (Autostakkert!2)
As AS!2 will not readily accept CR2 RAW pictures, they must be converted
first. Only one choice : TIFF !
PNGs will take 200 x more time to process - that is many hours - than TIFF
in AS!2 !
If ufraw-batch
has been installed previously from http://ufraw.sourceforge.net/Install.html
,
then RAW CR2 to TIF can be done with as a command (right-click pasted
from below) included in the Target field of a shortcut :
"C:\Program Files (x86)\UFRaw\bin\ufraw-batch.exe" "O:\TBShvatMoon\GoodCR2\*.CR2" --wb=auto --saturation=3 --out-type=tif --out-depth=16
The part in blue is to be changed for the location where sit the CR2 ... also note that I included a first saturation step here (+3).
Also as I will do here to ease the PC process
with less huge pictures using the
shrink
option
and
also
softer
colors
using smoothing
(about 3s / pic) :
"C:\Program Files (x86)\UFRaw\bin\ufraw-batch.exe" "O:\TBShvatMoon\GoodCR2\*.CR2" --wb=auto --shrink=2 --saturation=3 --out-type=tif --out-depth=16
other parameters that could be used : --color-smoothing --interpolation=ahd
Below is a single converted RGB 16b TIFF (25% size)
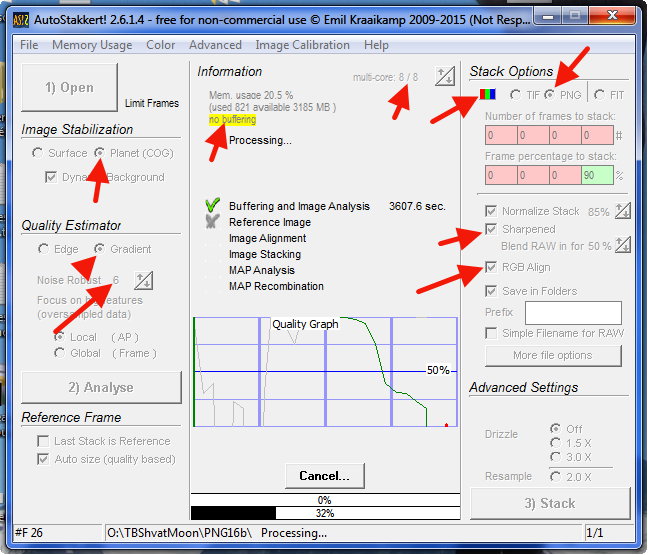
Then select & draw all the TIFF (I had 26 which
is really a maximum to fit in usable PC memory in 32bits just after a PC
reboot !) into AS!2 in No
Buffering mode
!
Analyse in Planet (COG) mode,
when done Stack with a single 400x400 AP on
Aristarchus e.g. and '90% Frame% to stack' and also "Sharpened
Blend with RAW 50%)
...
It will take a few min on a
fast PC ! You can save as PNG now.
See important parameters below :
Results below (click for full size JPG)

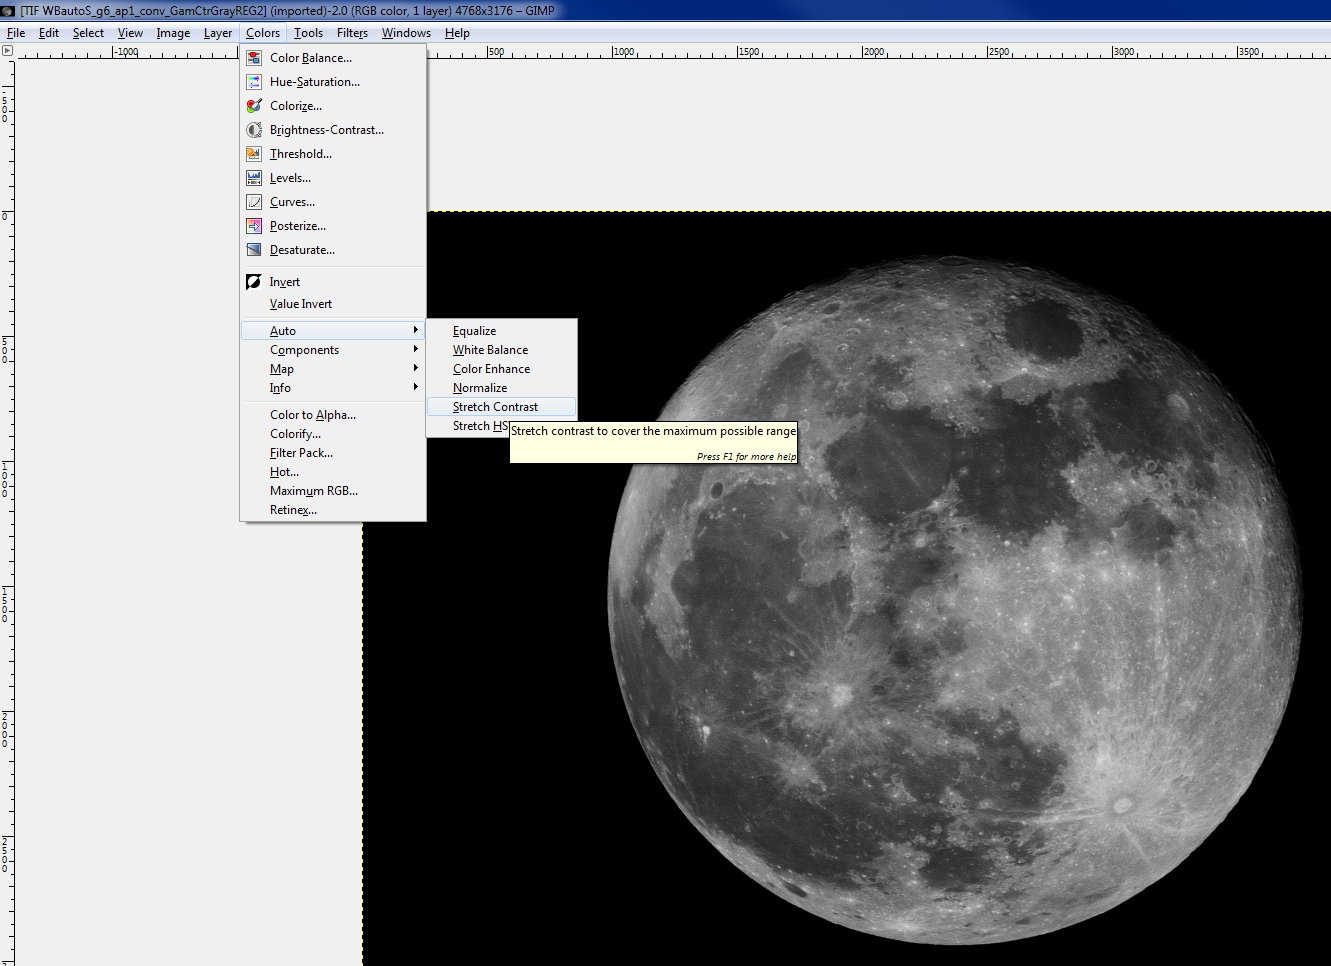
The convolution sharpened picture, once converted in grayscale, will be used later as luminance, rich in details !
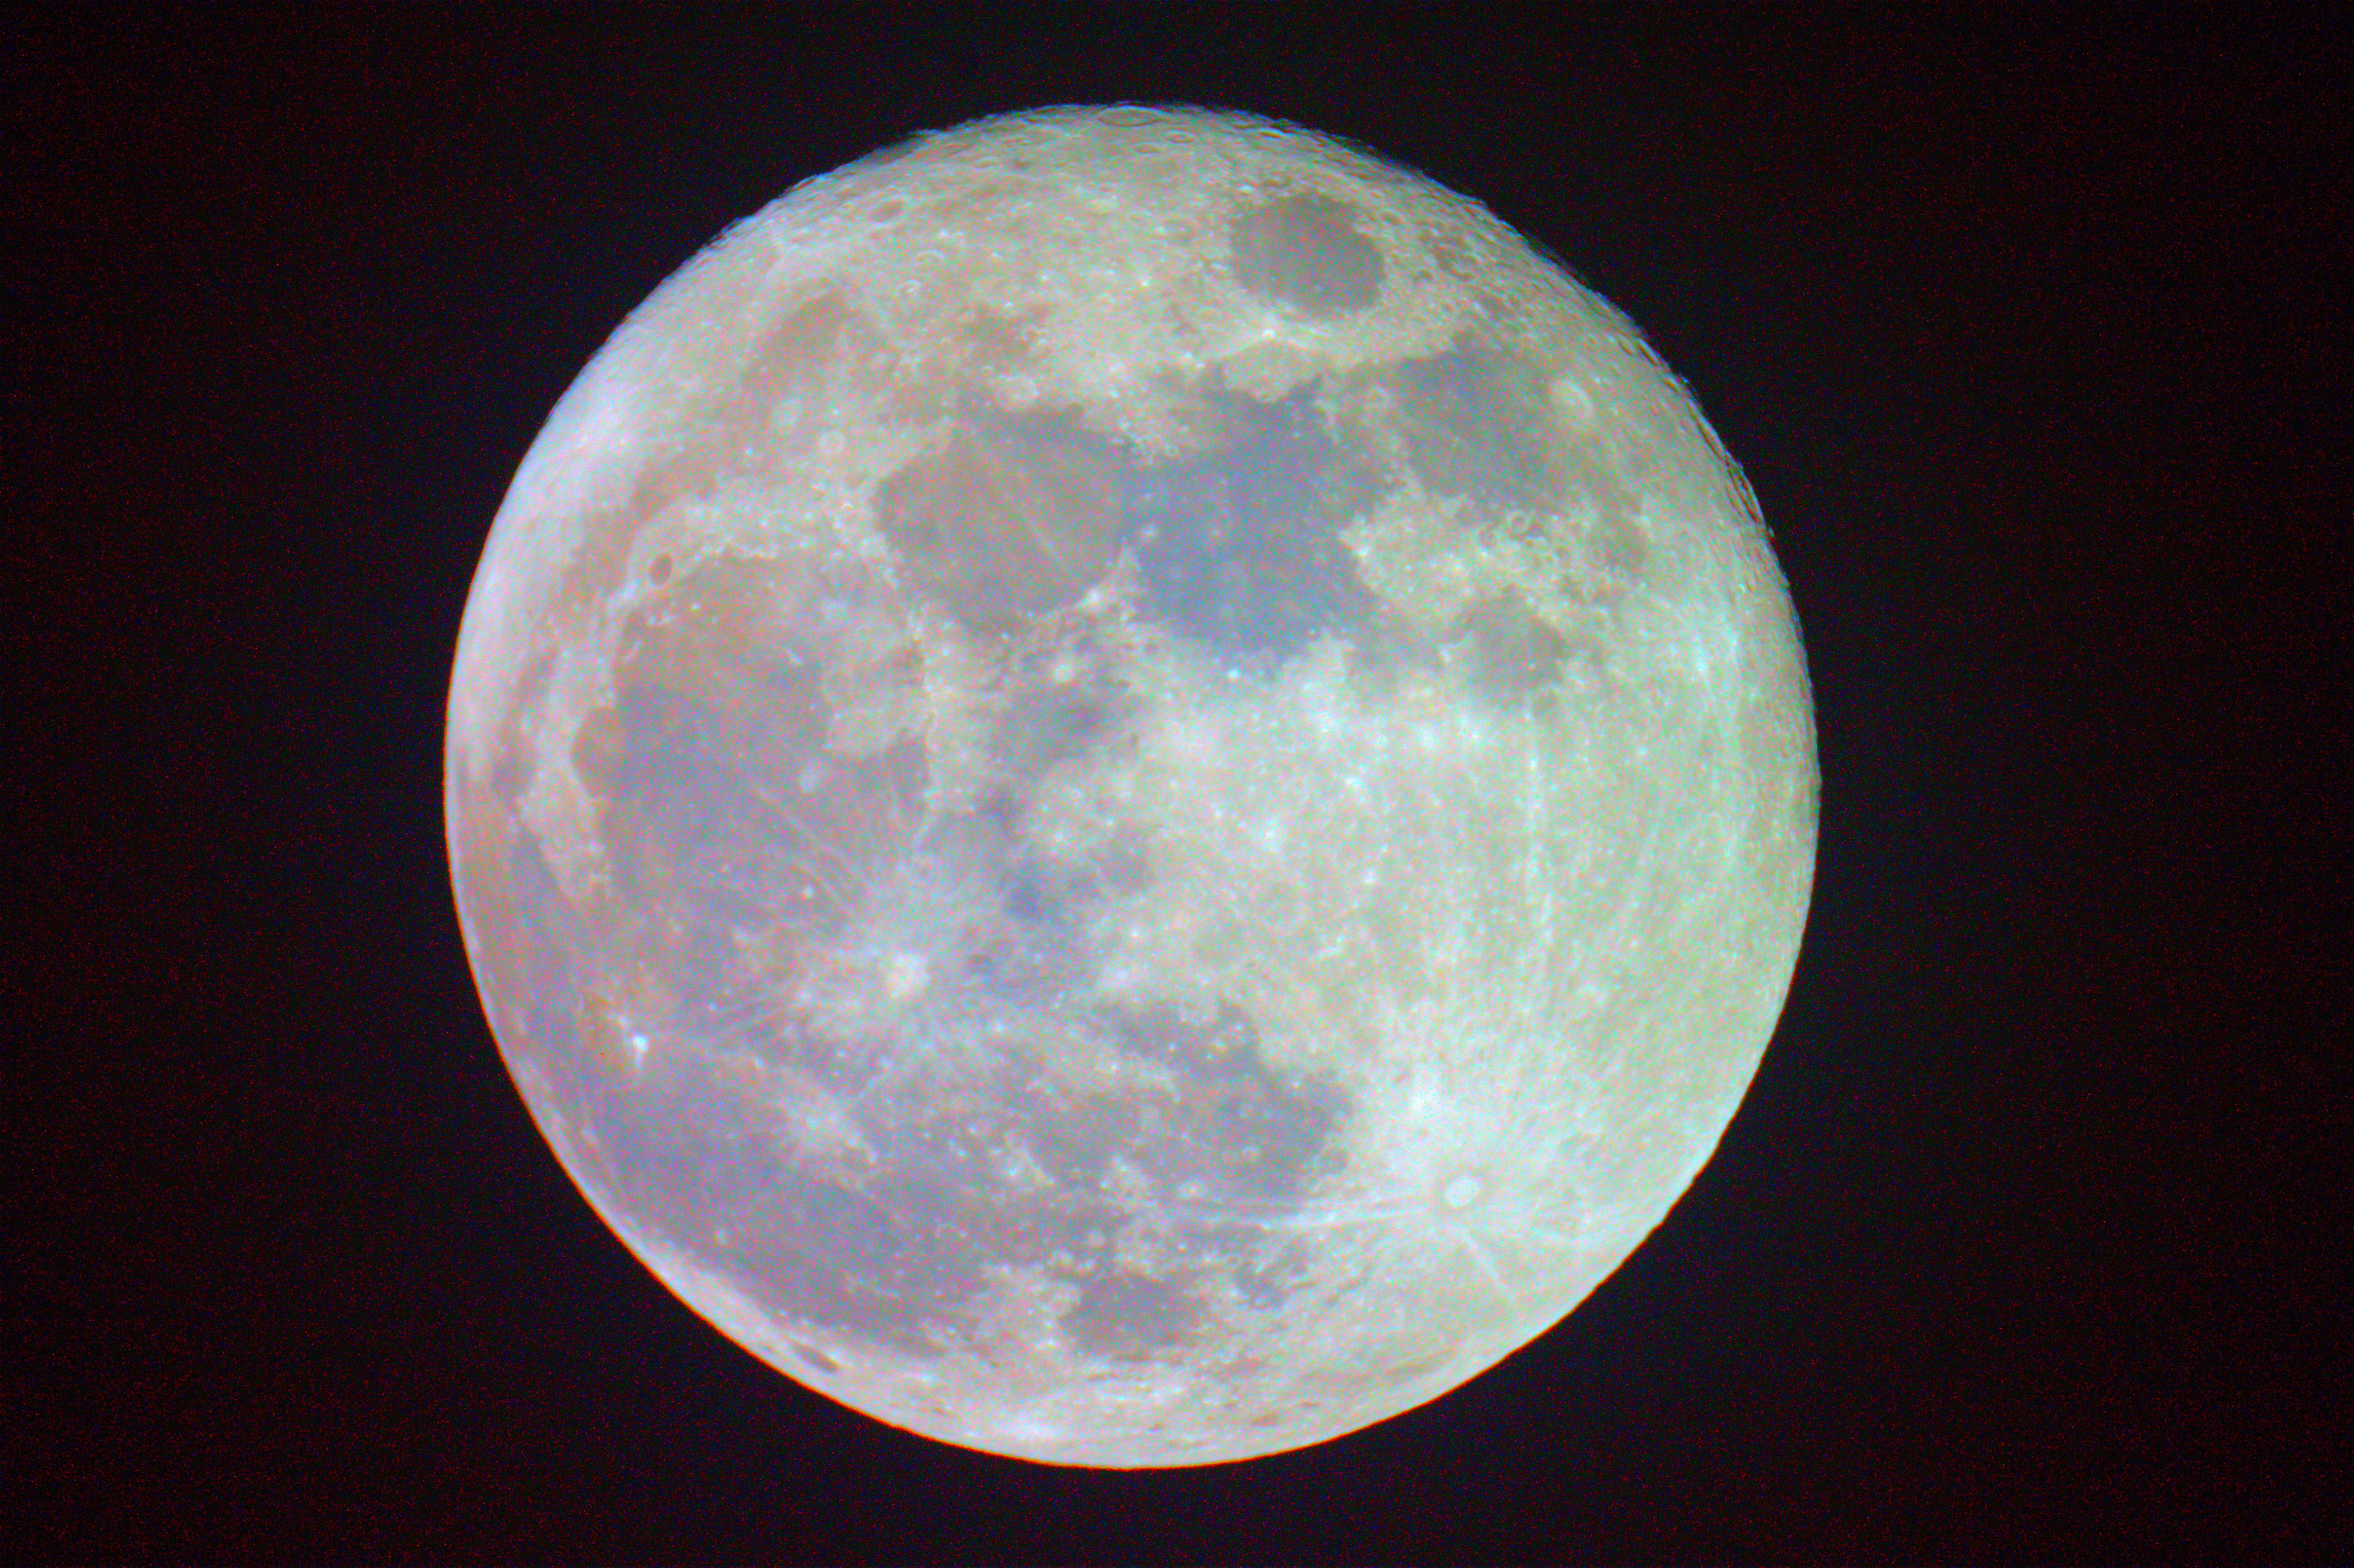
III] Luminance enhancement : gamma and contrast
Better keep pale RGB colors for the time being (not shown in picture below BTW) ...
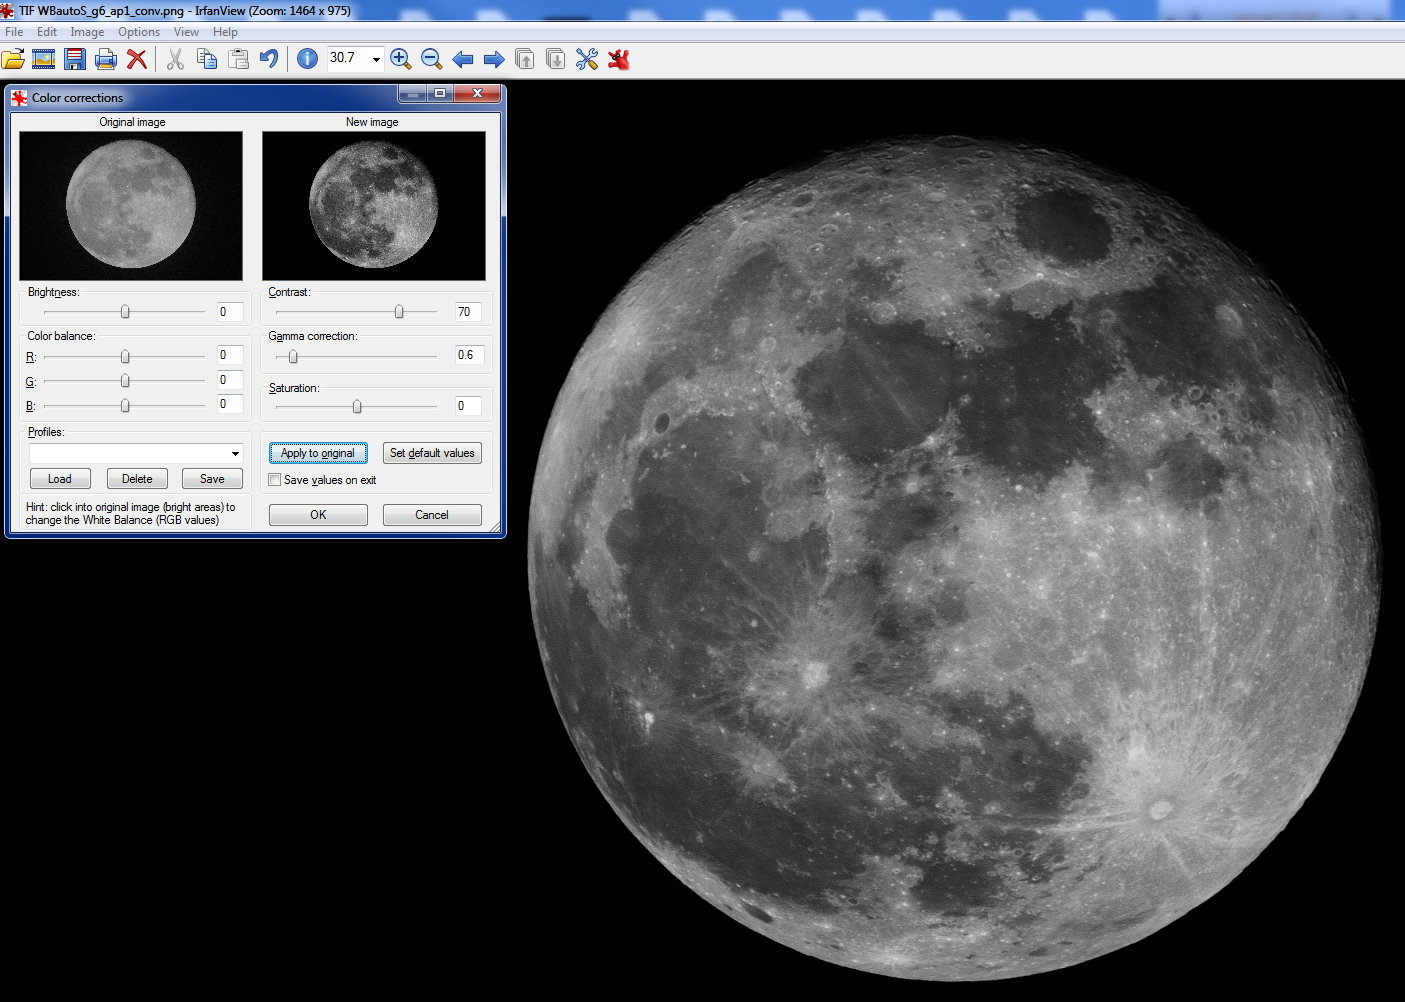
Result : (click here for jpg)
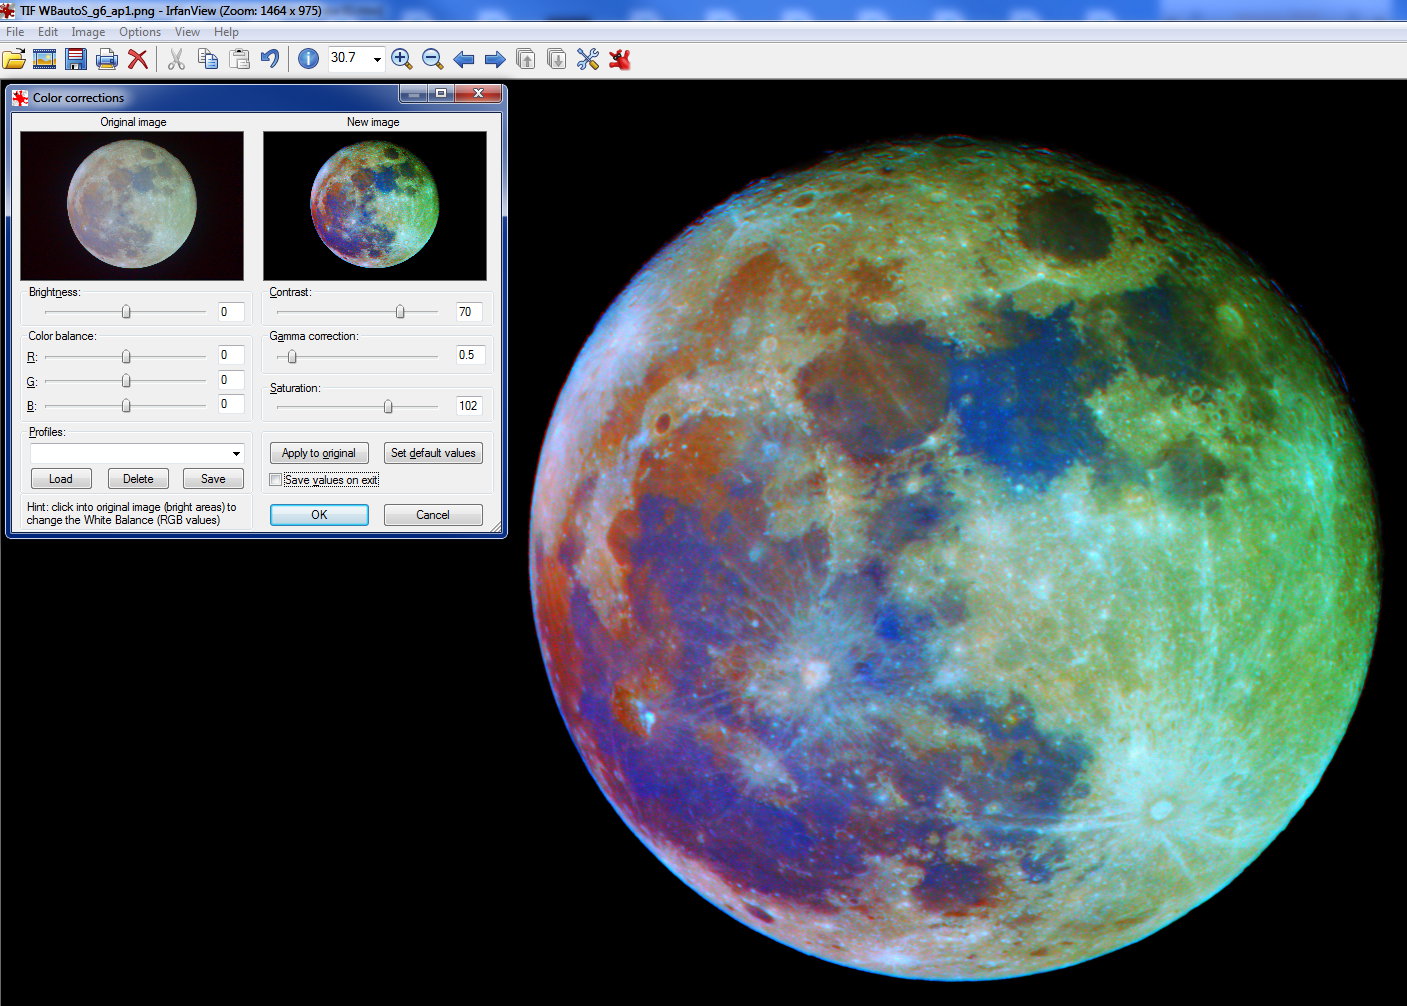
IV] Saturation enhancement
With the "not conv" PNG, let's enhance saturation in Irfanview in 3 steps ...
Step 1 & Step 2 twice same parameters :
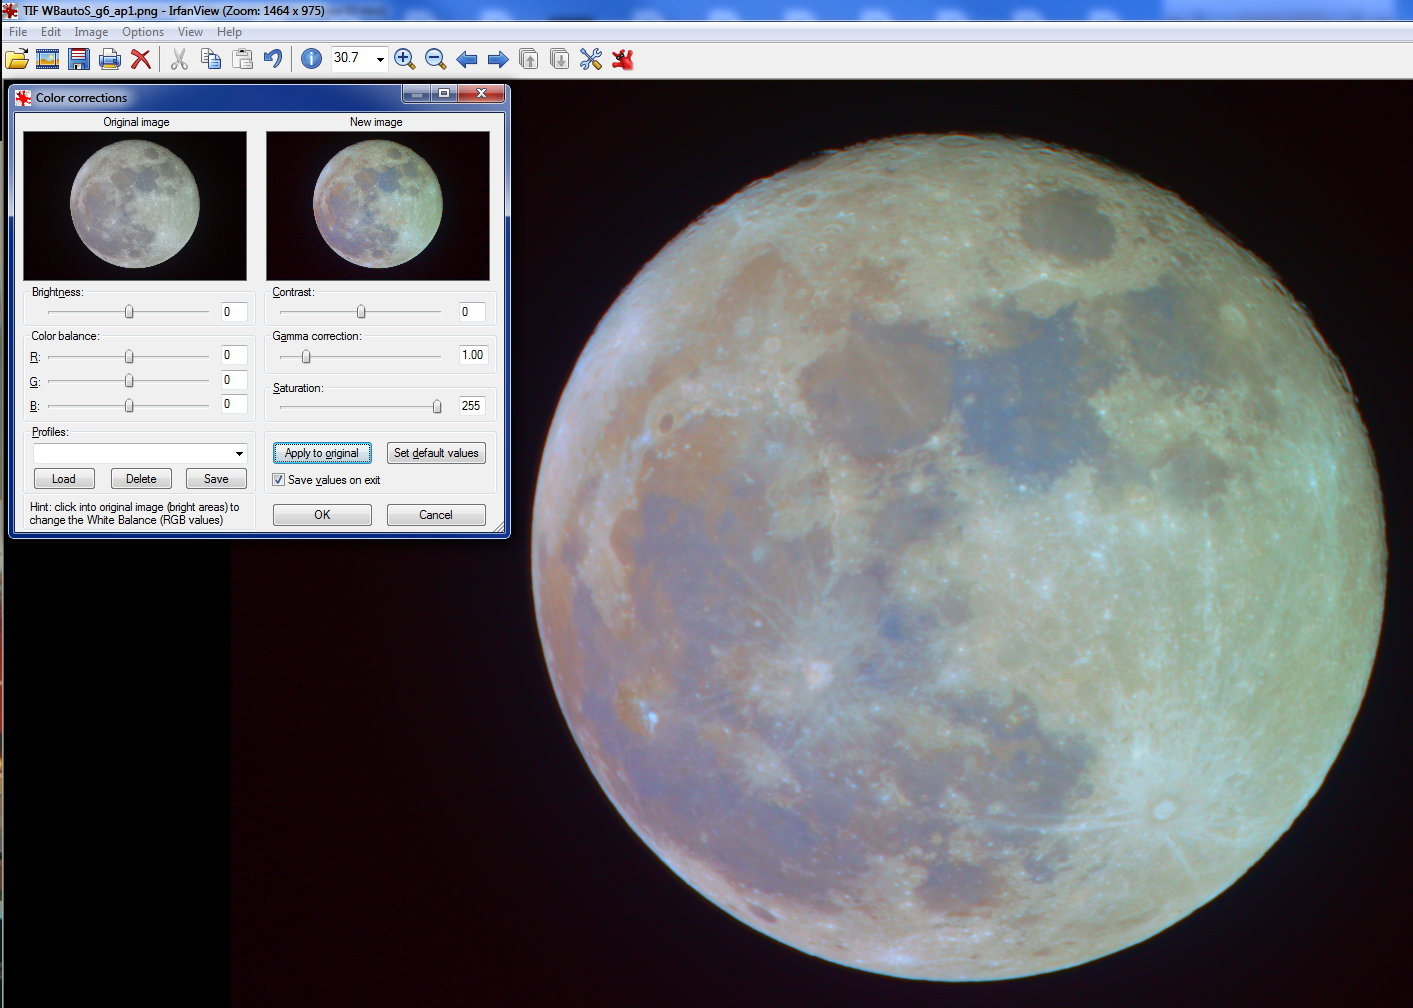
Step 3 is different :
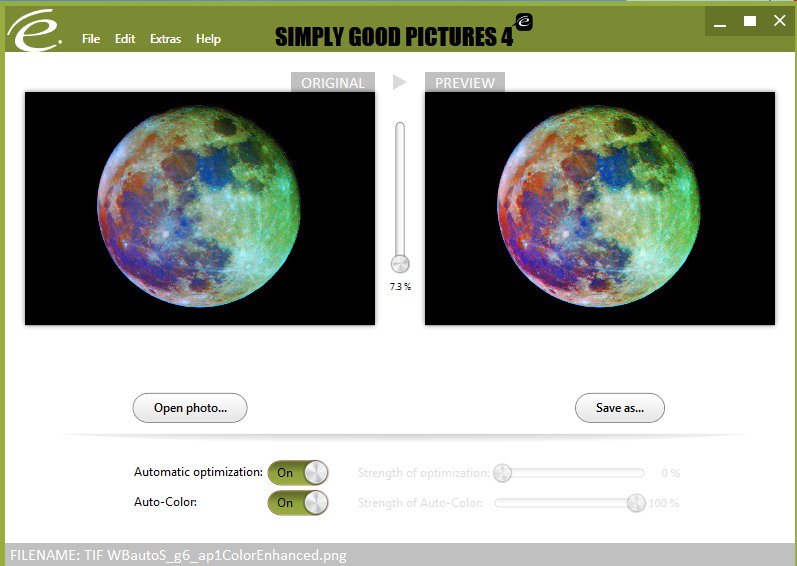
Now a bit of optimisation in Simply Good Pictures 4 Free :
Now in RegiStax6 I use the RGB Alignment Tool with "Estimate" and don't forget after "Do All' !

V]Register in RegiStax5
As there has been some pixel changes, register
the enhanced RGB Luminance image and the modified enhanced color image
so they will fit
well when
mixed
later.
Use 1 large
AP on Aristarchus. At Stack page save both same original size registered
PNGs.
VI] Mix in GIMP2
Now open both images in Gimp2 by drawing them into the empty start window.
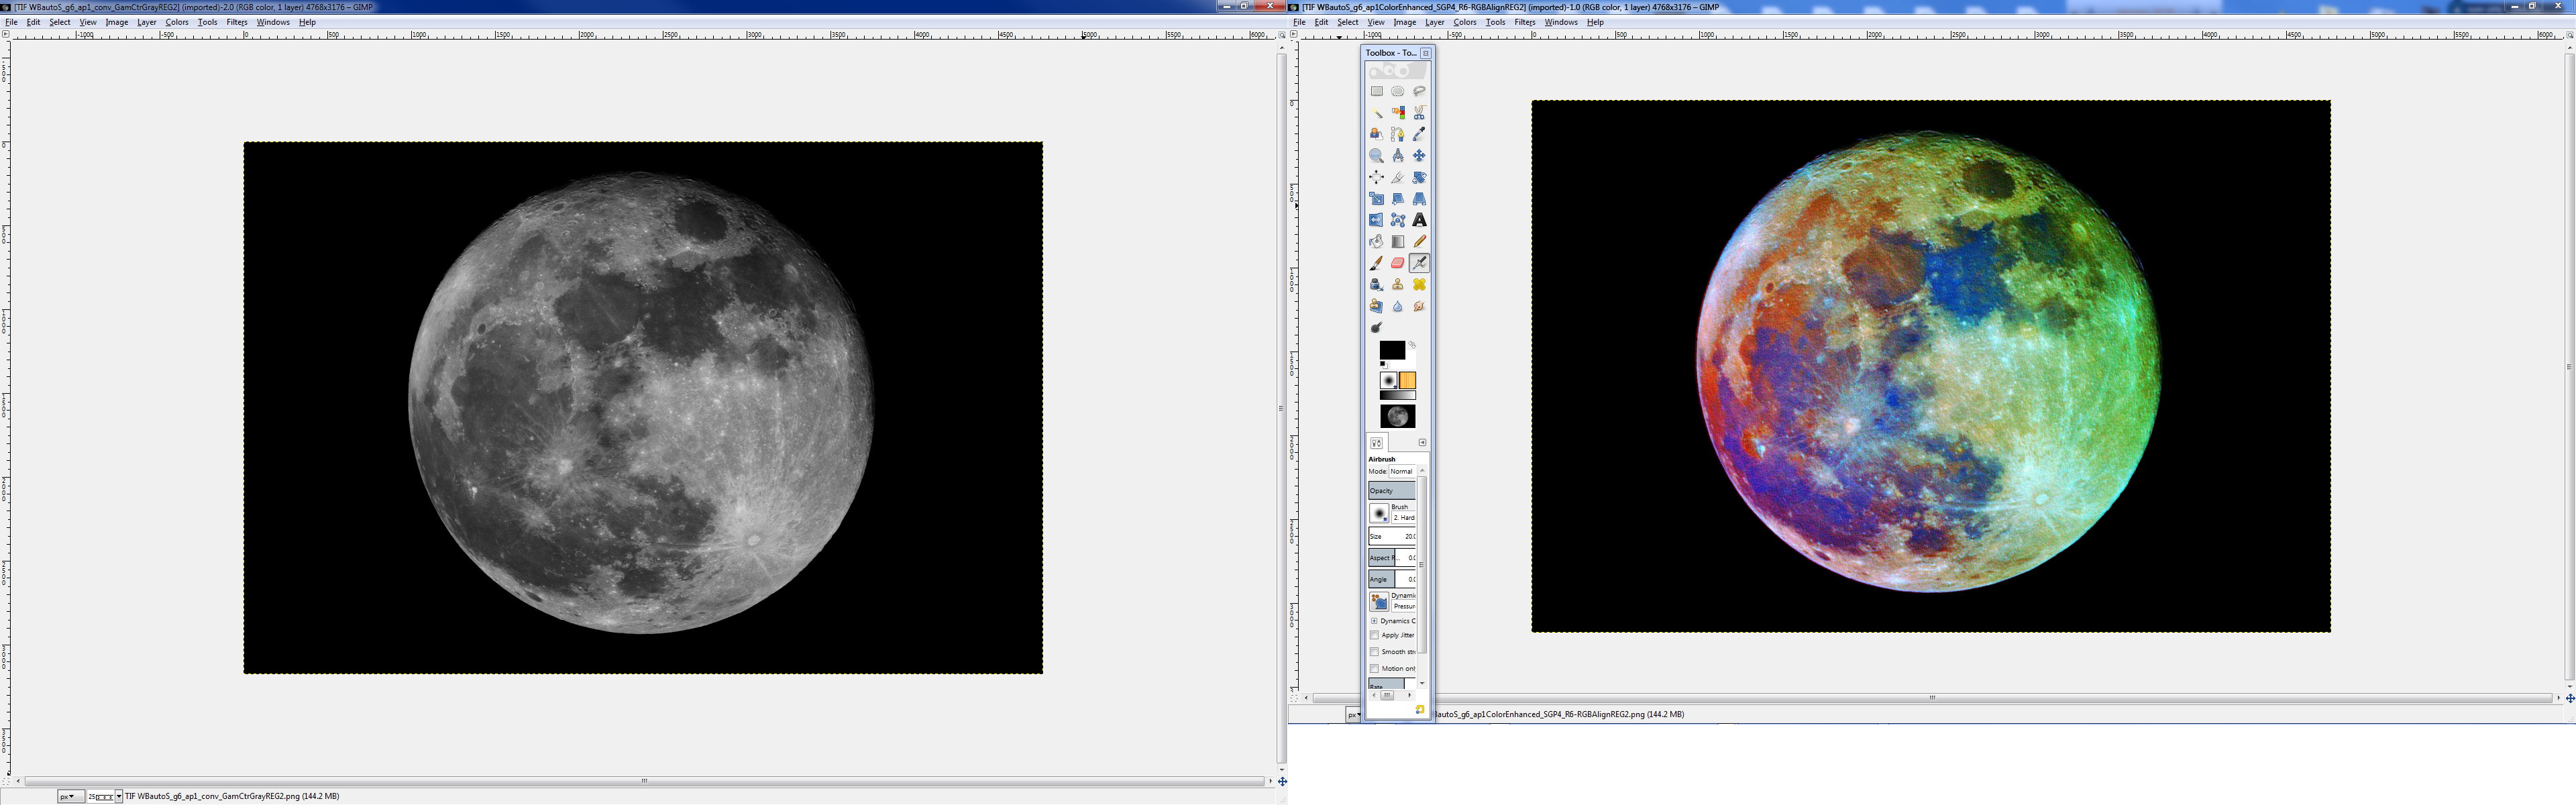
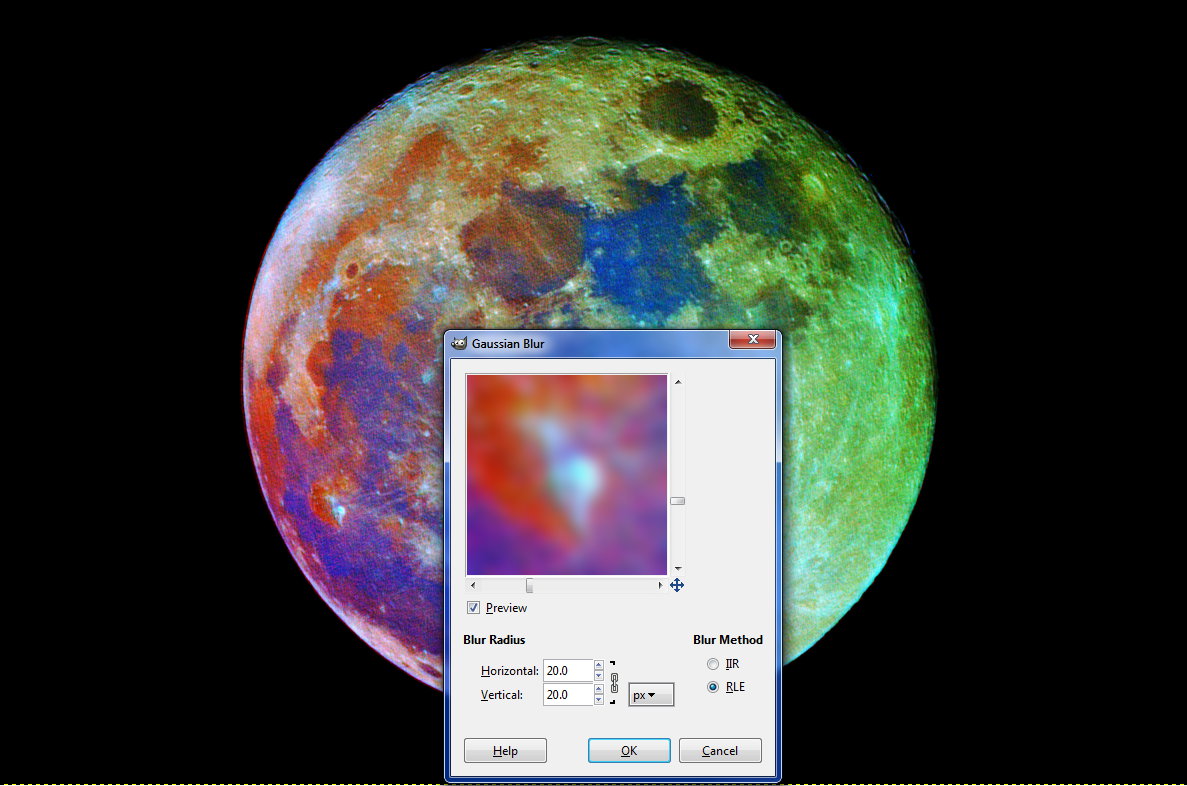
Blur color image, we don't want grainy aspect
Decompose colors ...
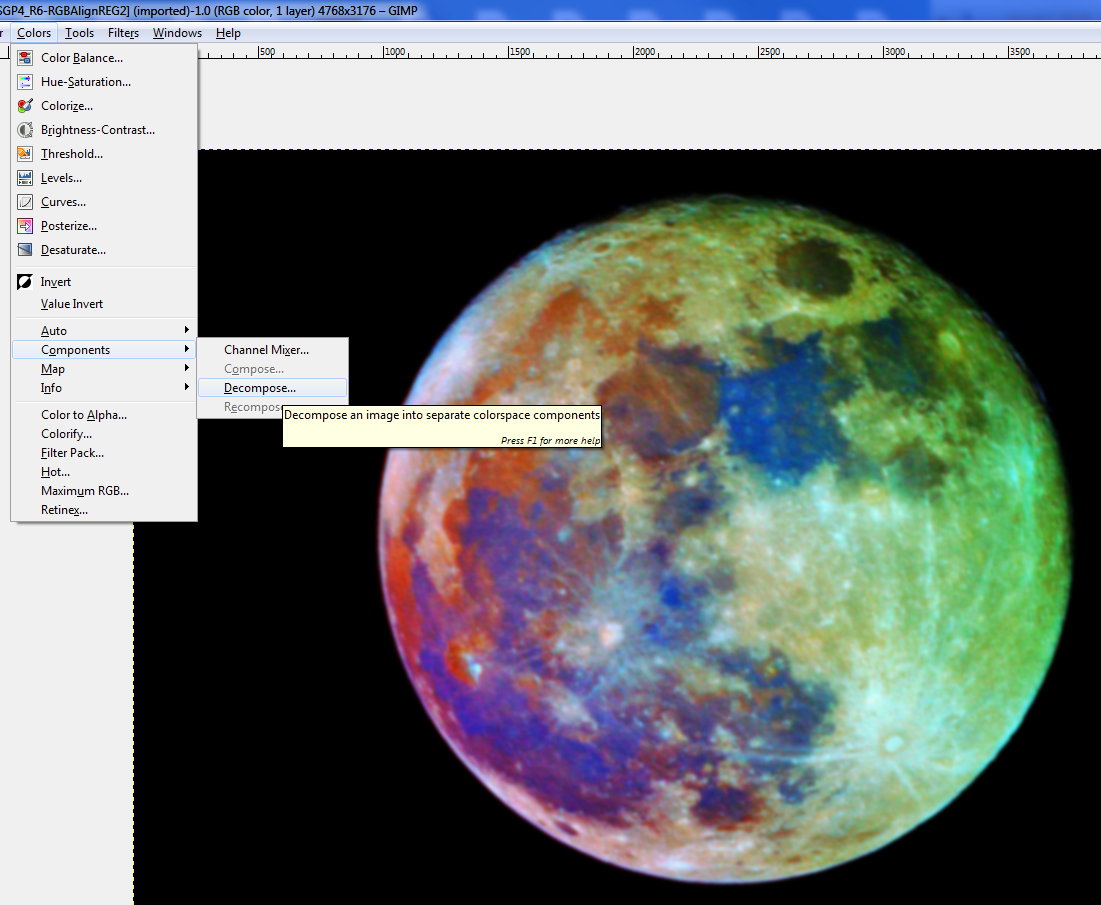
... into HSL ('Decompose to layers' is unchecked)
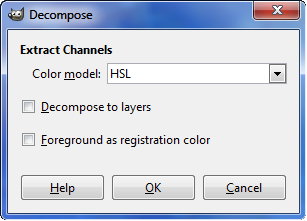
Ok ...
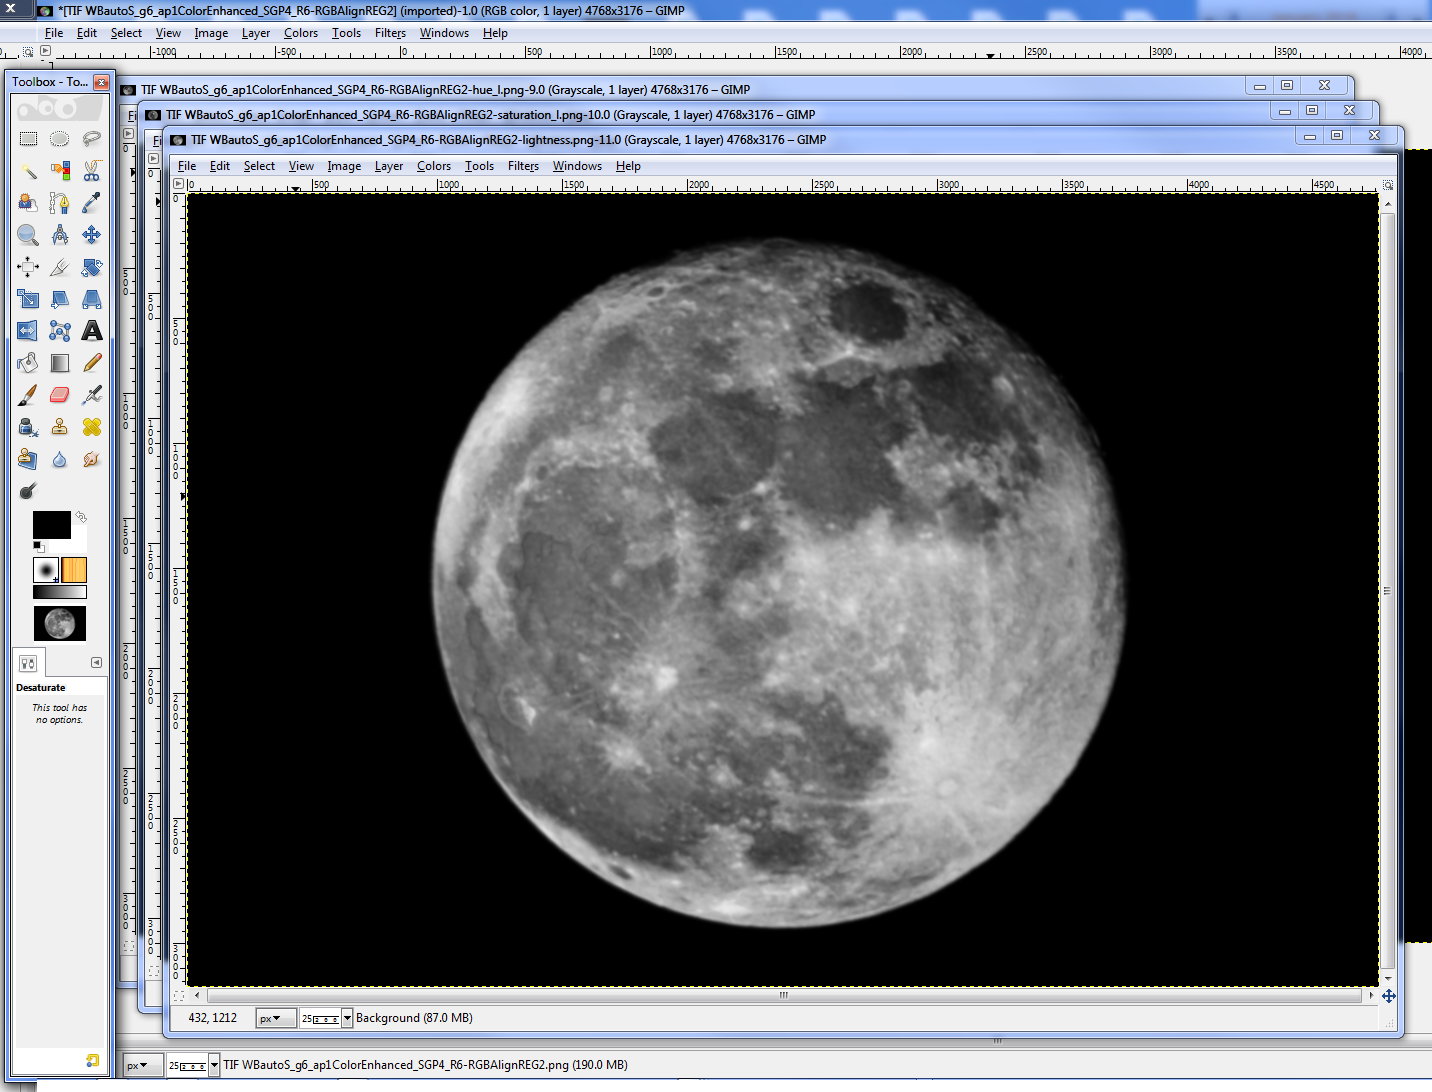
Now convert the luminance picture in grayscale in Mode Menu :

then
Then CTRL-A, CTRL-C
and copy into lightness ...
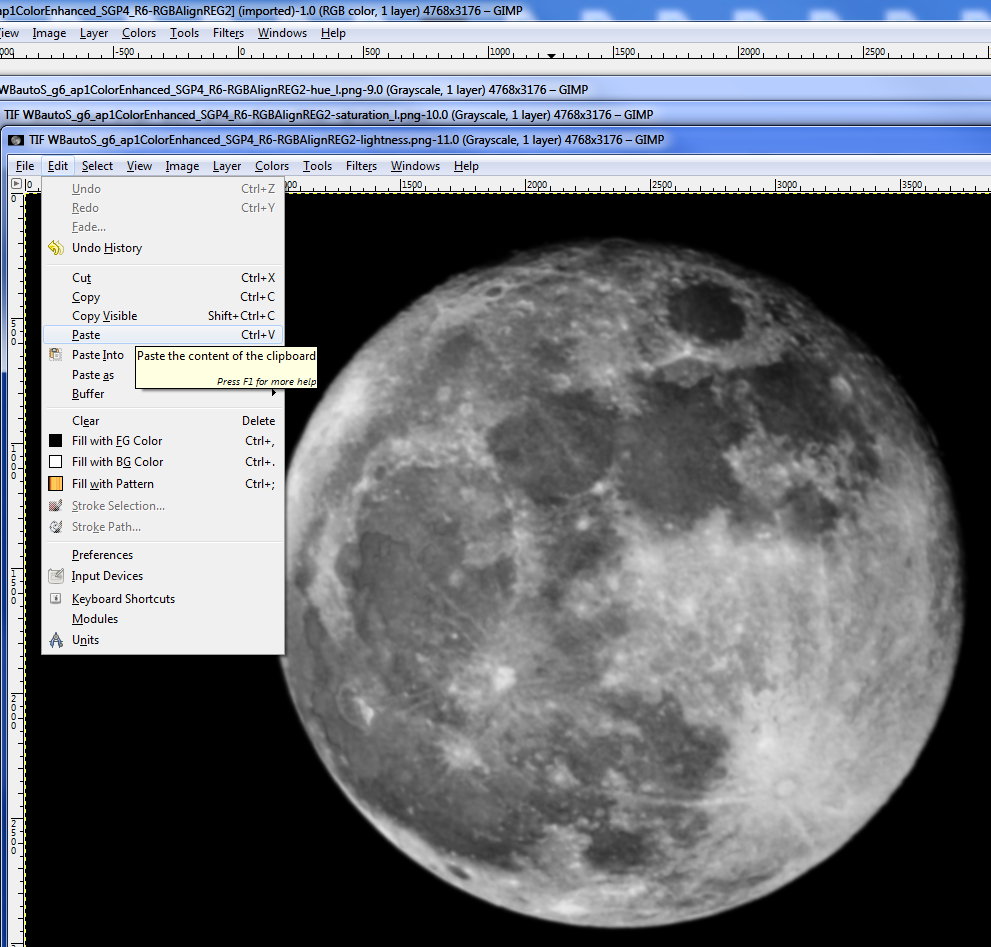
See change in resolution
!
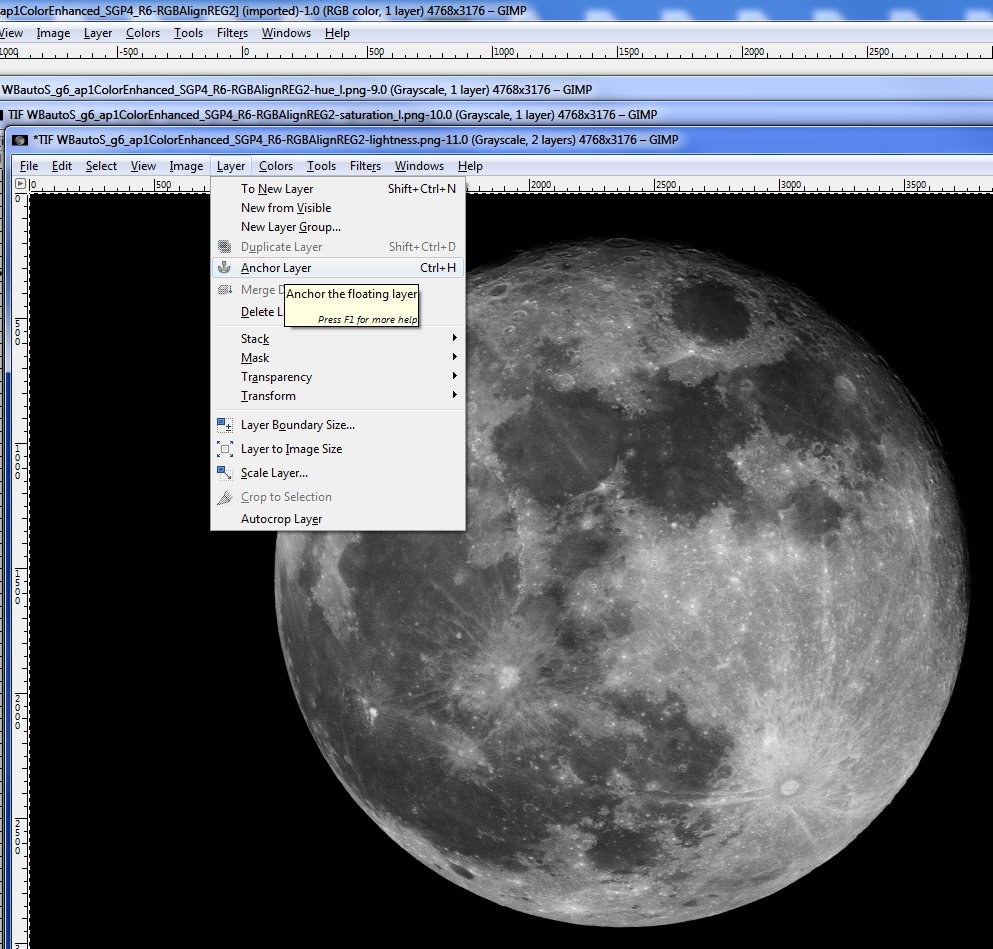
Anchor the floating layer ...
(Note : this is the only way to be able to recompose because layers have IDs
!)
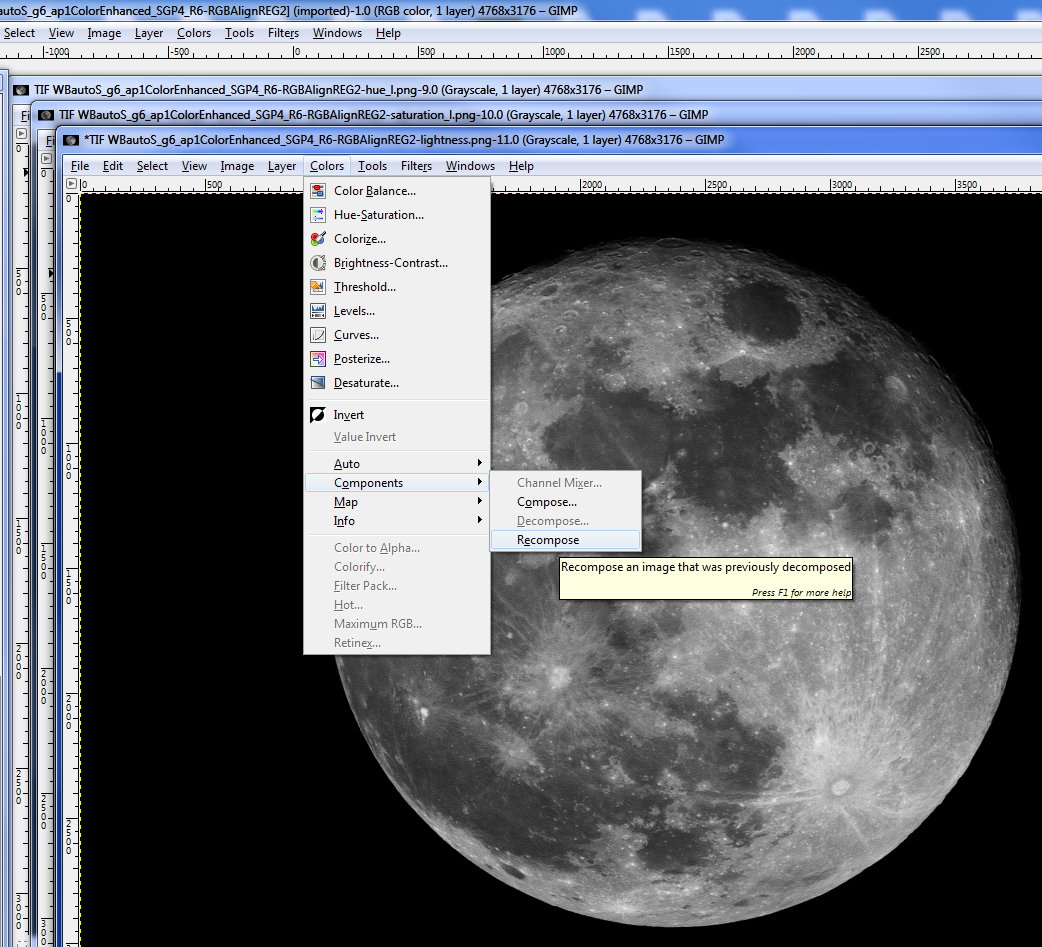
Now Recompose :
When looking at the original color image it has changed and now looks now like this !!
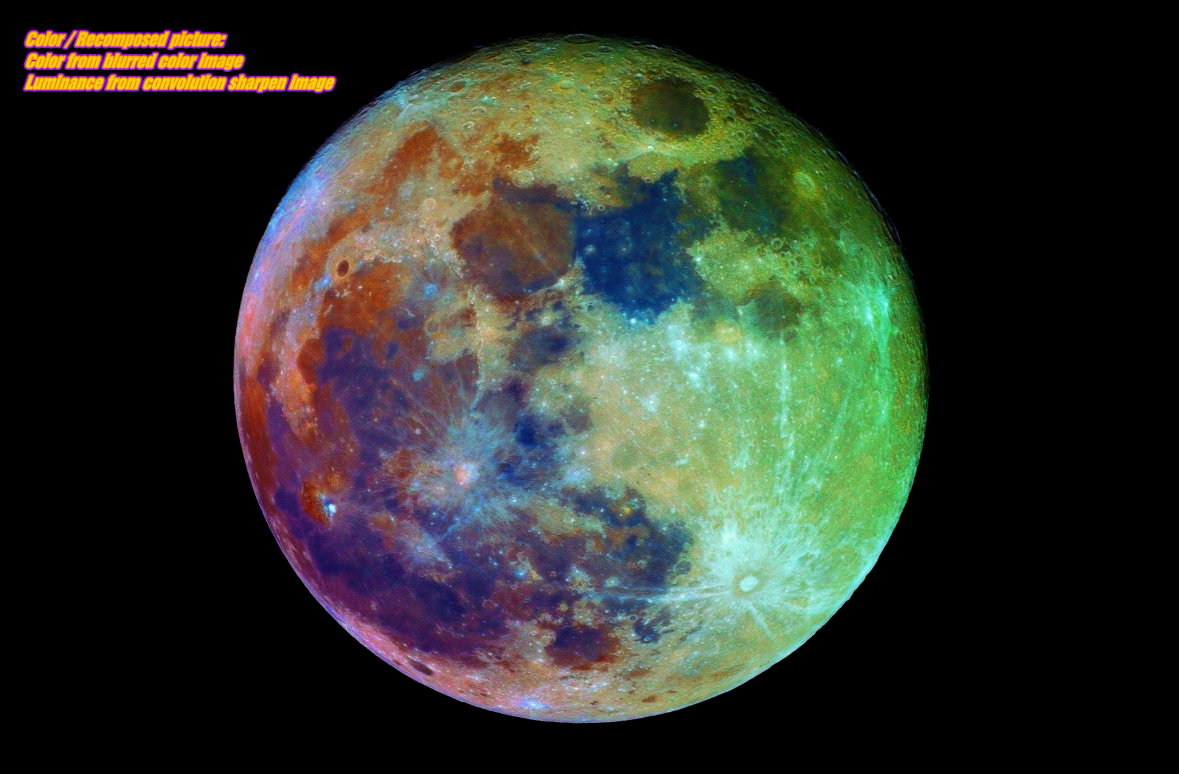
let's arrange a bit the Color Balance ...
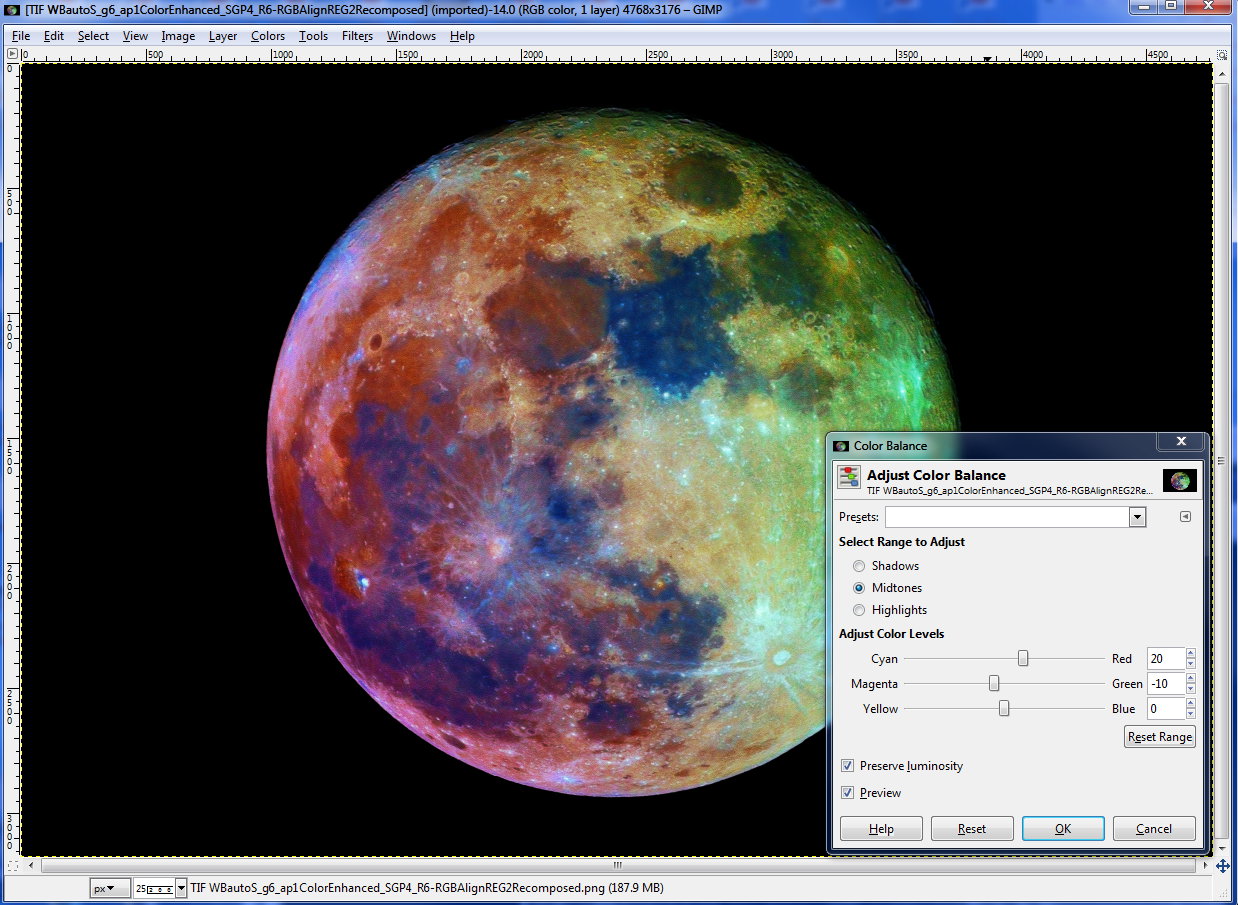
done !
VII] 3D ...
LuSol3D can be used but resulting images will be smaller than the screen. See one of the frame of the couple below :
For best result, Map the picture on a sphere with
PovRay.
This step was done by Alain.
Final results at top of page !
... As POV-Ray to finalise the 3D image, lets go to the special POV-Ray page ...
©1999-2016 Sylvain Weiller
DemiW(1920x2160).JPG)
.JPG)
DemiW(960x1080).JPG)
.JPG)
![3D - UHD [.JPG]](15ShevatMoon_3DUHD.JPG)