Step by
step making a lunar mosaic
with Paint Shop Pro
(my last II
millenium contribution !)
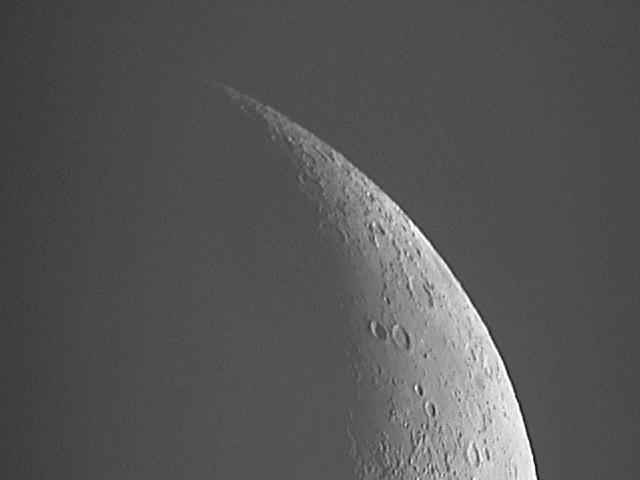
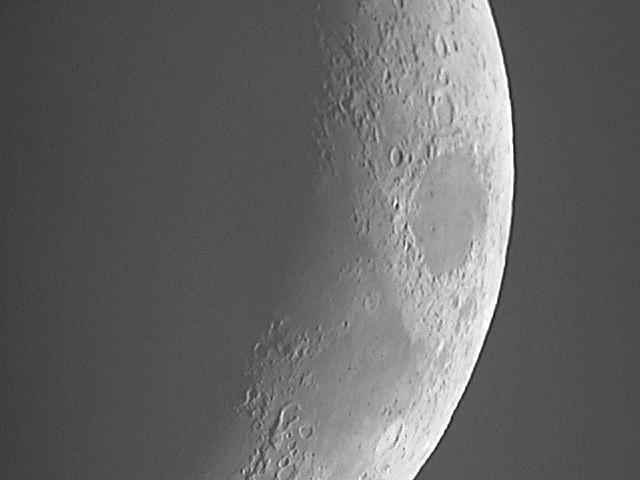
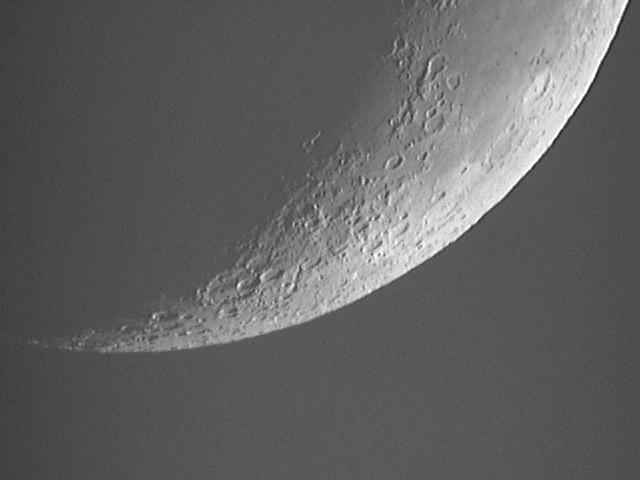
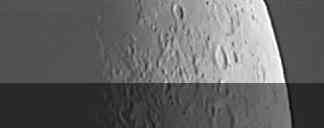
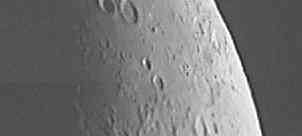
Below are three lunar images, each selected among five, of the Moon. They were taken at the end of the afternoon (this explains the rather light background which makes the merging more difficult !). I used a 102/900 Perl Vixen fluorite with two Celestron focale reducer in line, then at FD 4. To ba able to focus, it is required to put the Vesta Pro very close from the last lens. I used scotch tape (I am waiting for a dedicated adapter from Danny) tu put it against the 50mm threaded part of a Celestron T-adapter, which is then screwed at the back of the last reducer. All following images are pretty much compressed and often only a piece is shown to permit fast download.
Once loaded in PSP (6+) the three images are deposited in a new large black background image as new layers.
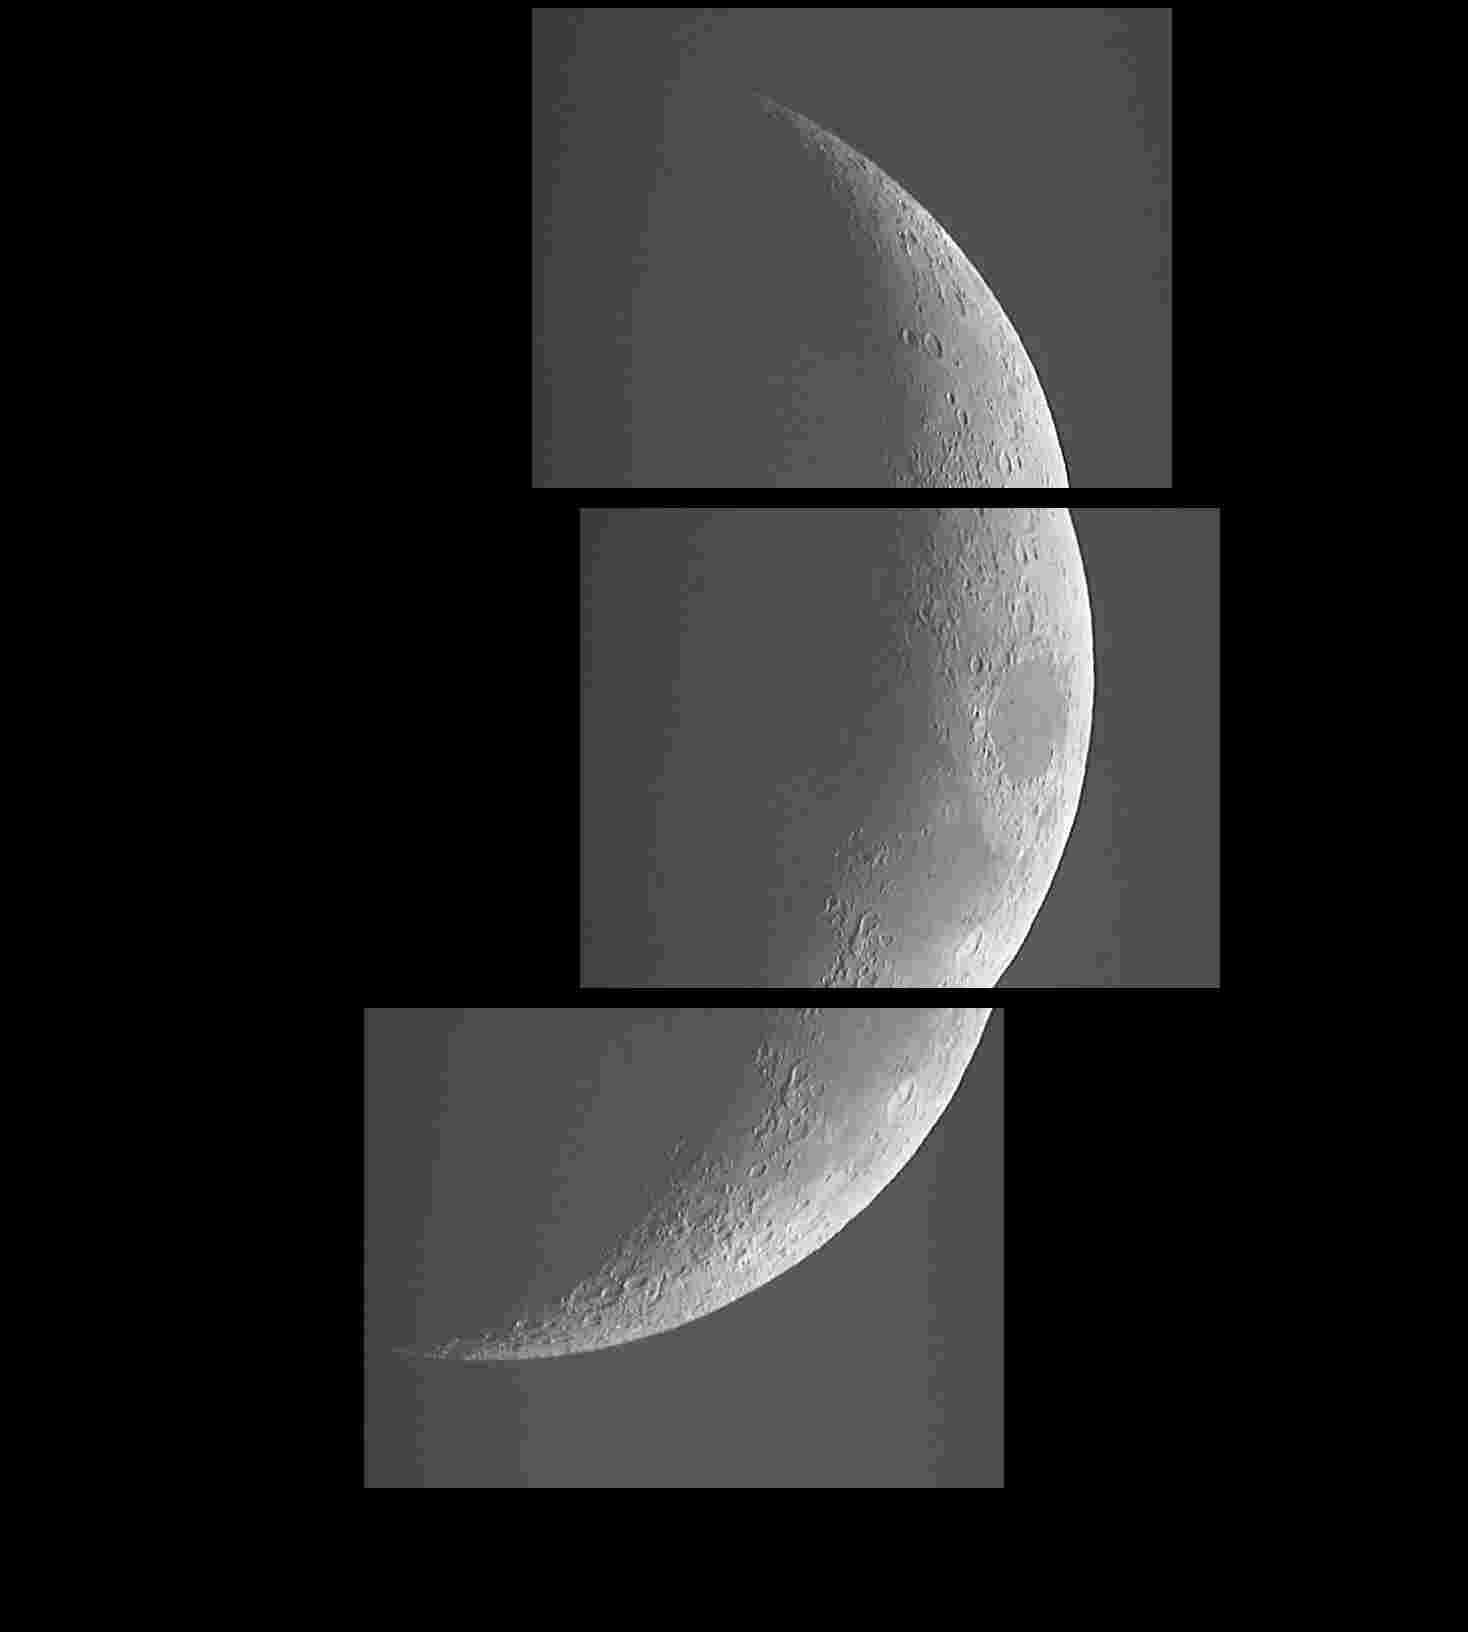
One click overthe middle piece (layer M, the other are T(op and B(ottom. Goto layers/properties and select 50% opacity (instead of 100). The layer then become transparent. Ok ! I know, for the time being PSP6 screen shots are in french but they should be rather standard for other versions. Please mail me if no and I will do my best to put english text.

By choosing the move icon (4 direction arrow) slide the M layer onto the H one. Image below shows almost good position. You should watch linear sttructures and the limb if present.

Finally you obtain a 1 pixel perfect superposition
Set back the opacity of layer M to 100% as below
Adjust the luminosity of layer M in order to make the junction allmost invisible

The best way is to use trial/errors with the luminosity/contrast function. If not satisfied, just undo and change the lum value (do not change contrast in general). I suggest using a 2x or 4x zoom factor and use the pipet to check the RVB levels around the junction until you get all but identical values. As you can see on the above picture, the juntion becomes quasi invisible. We will see just below what to do in case of difficulty.
Now proceed in the same way tu put B onto M
The mosaic is not bad now. Nevertheless the new B/M junction is rather visible
!

We will do as follows, according to my own experience
...
First apply a 3x or 4x zoom. Then make the flatest rectangular selection
around the junction and apply to it a noise/median filter

Now a sharpen will give the lost details back

When we comme back to size 1 we can see that the junction is all but invisible on the land !
To improve at the sky level, we can use two different methods, one staying with PSP, the other one in Iris (C. Buil freeware).
First in PSP :
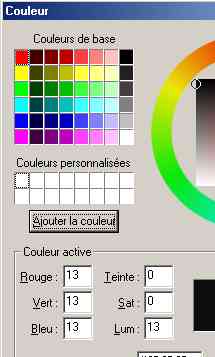
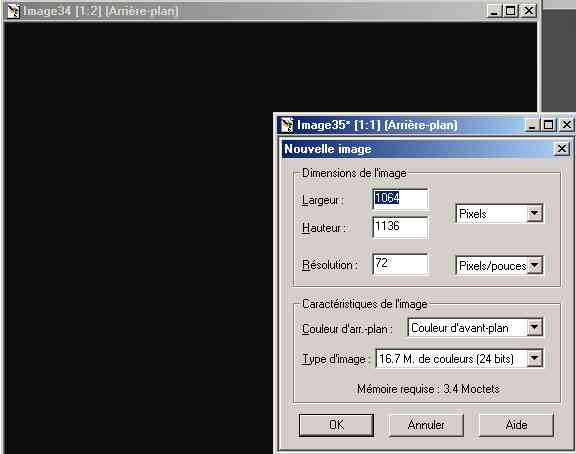
We select a new gray foreground color Tint=0, Saturation=0
et Luminosity=13
We make a new image with the same size as our mosaic with this foreground color (here image34)
We now do an arithmetical substraction of the two images (Image/treatment/math) as shown below
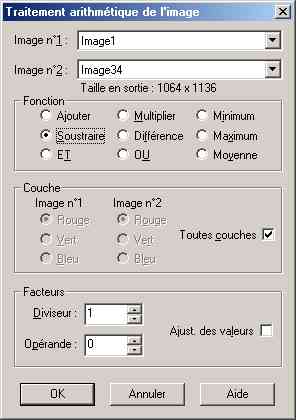
We get the new darker image below. We can now fill
the white parts with grey13.
If the image is still to much light, use 15+ for the gray value.

The treatment of the picture in PSP is almost done.
Just adjust Luminosity/contrast for the final result.
NB: for the Moon it is a good idea to change and save only in grey tones.
A better, less compressed
image than the one below is shown at the end of this page.
Let's see what we can do in
Iris
after converting the image in gray tones and saving into .bmp
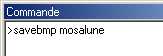
Just open the edit window in Iris and use the following command
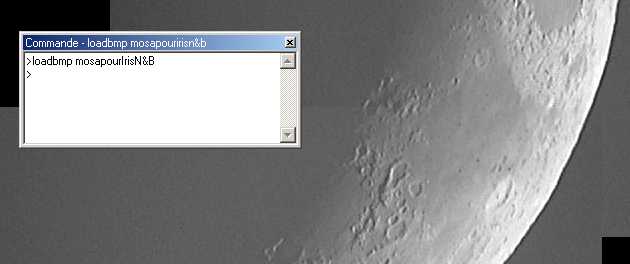
BTW, if the image was in 24 bits color, commands would have been "loadbmp24 mosapourIrisN&B"
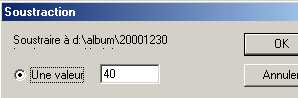
Use now the treatment/substraction command here with a value of 40 to darken all the image
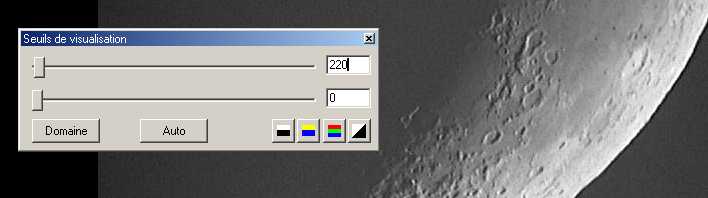
Adjust the vision levels
That's it. Just don't forget to save !
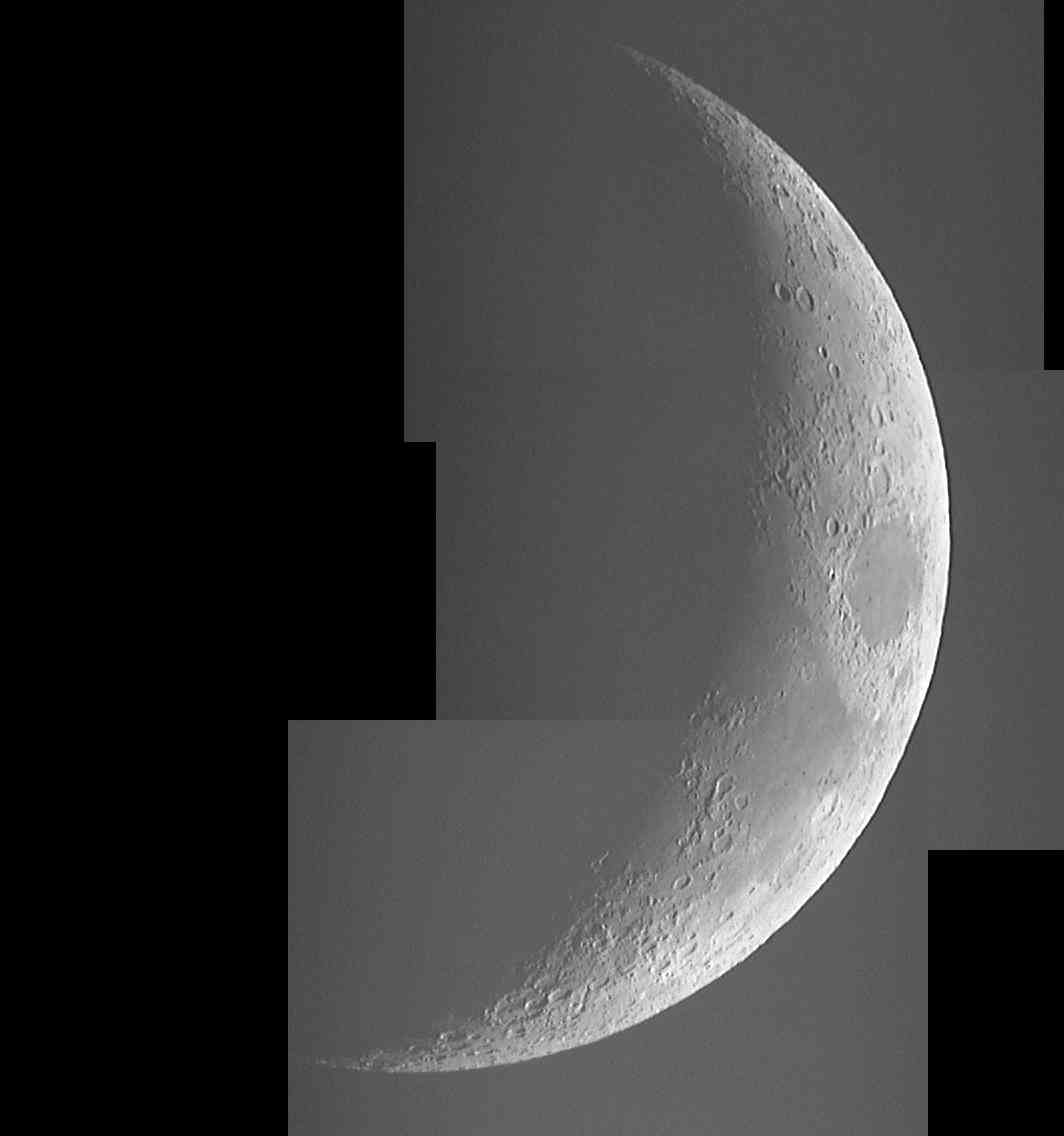
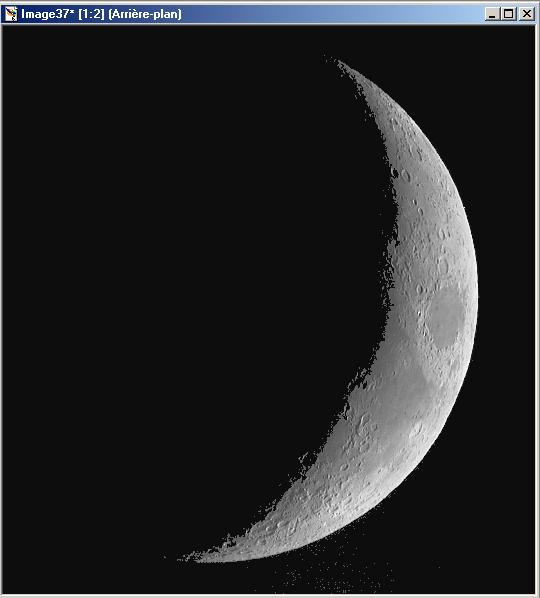
The end result of our work is
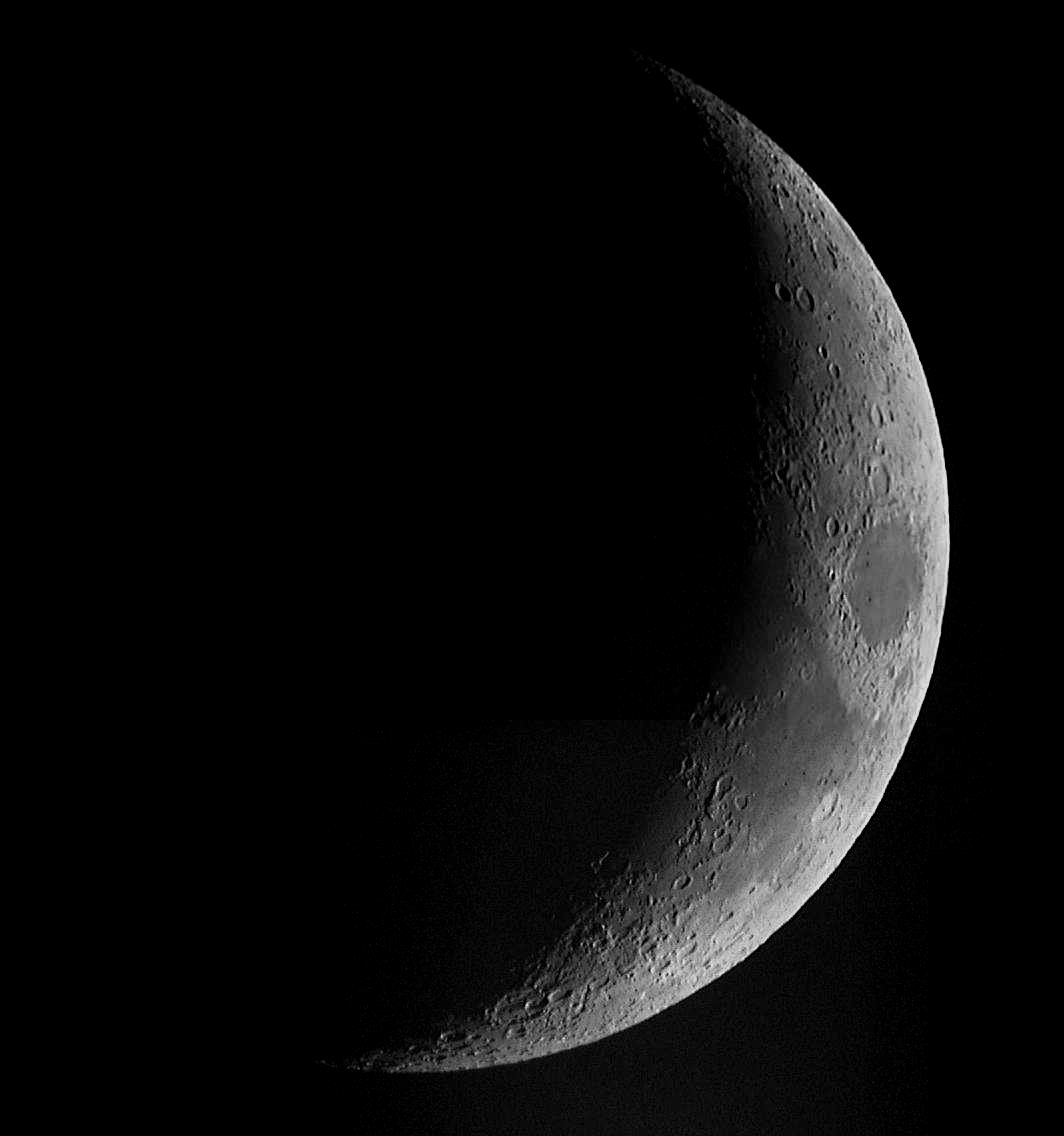
Below is a smaller version easier fitting better in one screen and less compressed (JPEG 25%)

Texts and images of this web site all Copyright S. Weiller, 1999, 2000
Permission granted to copy them for non commercial use