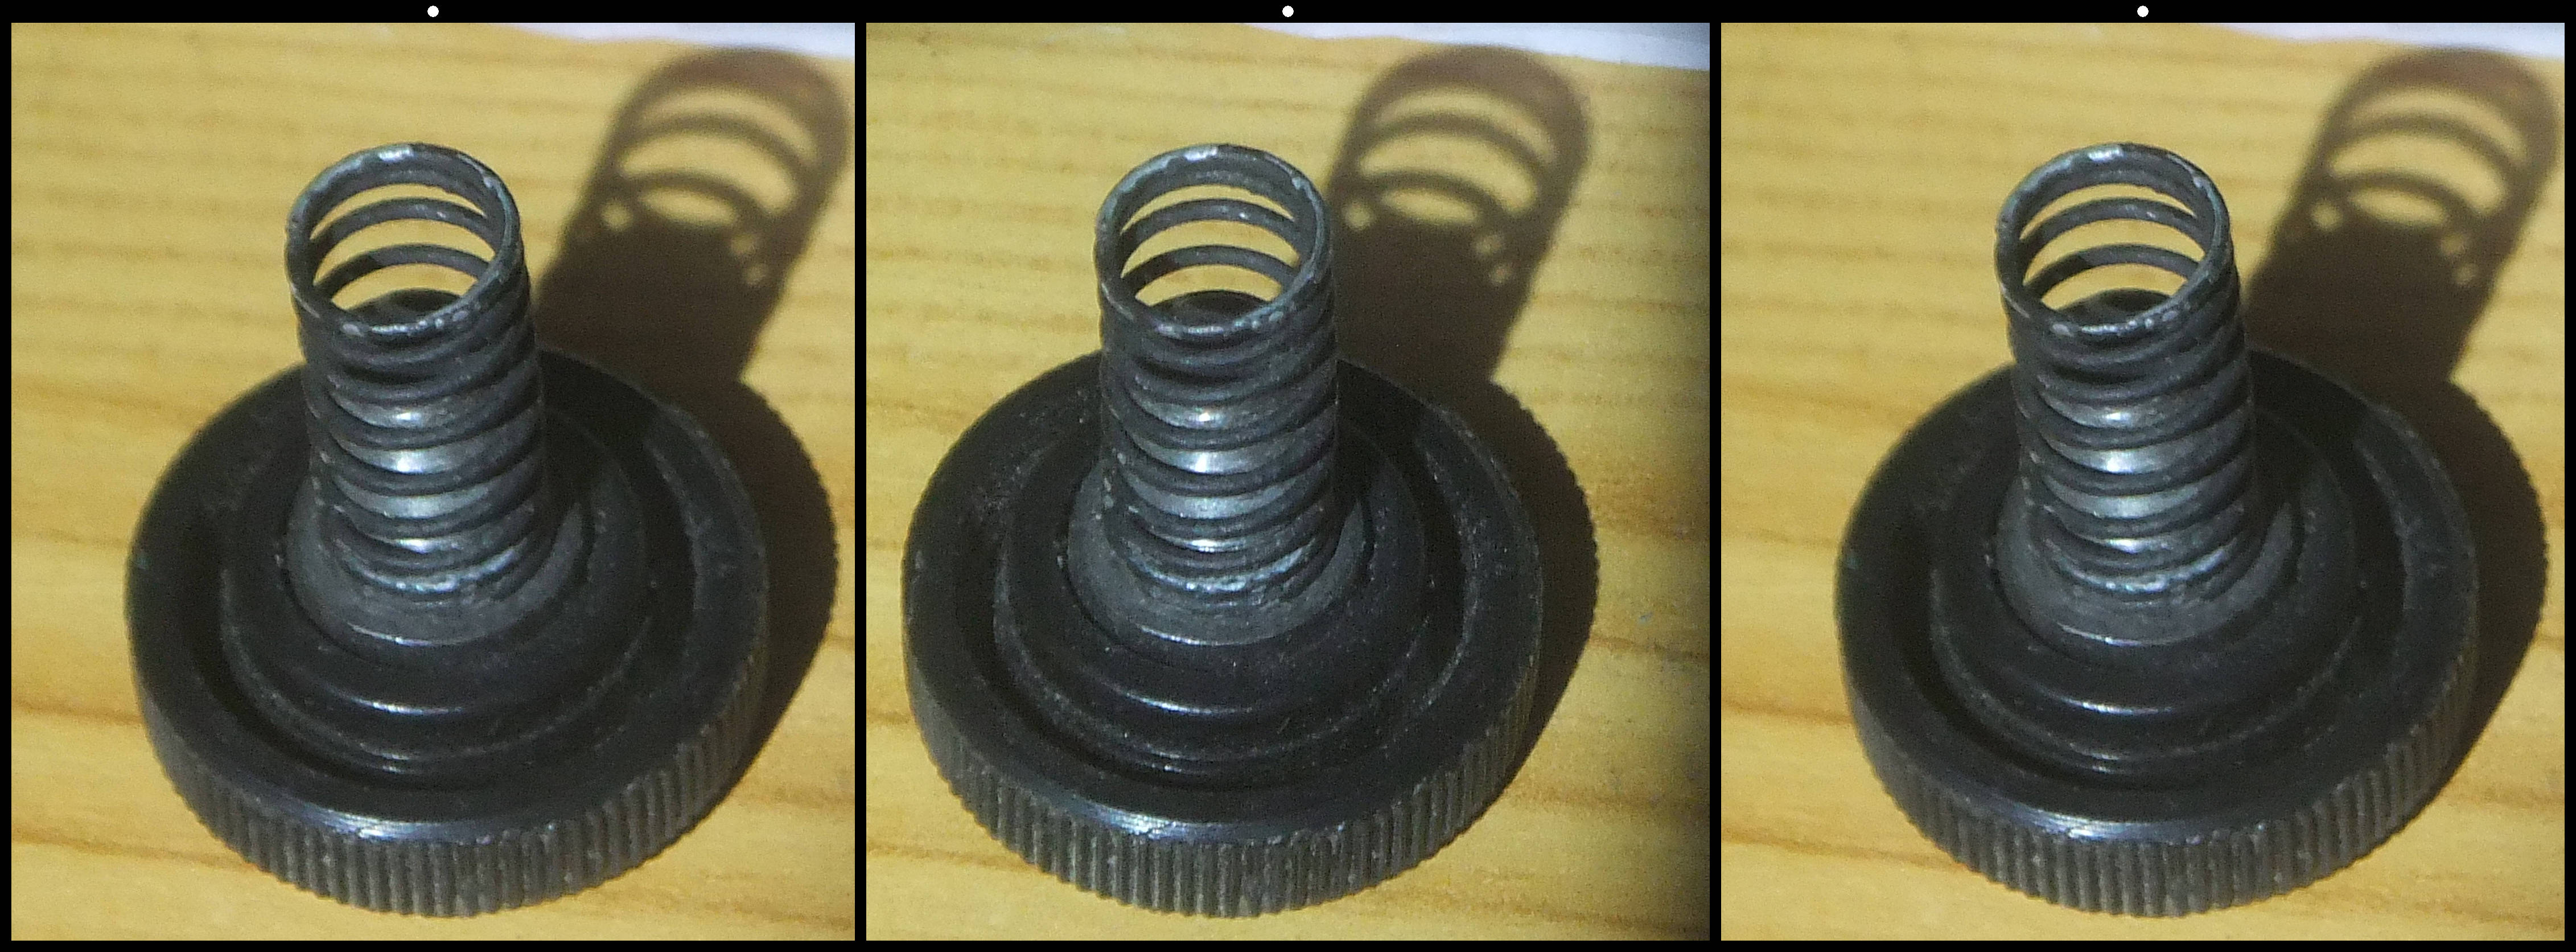
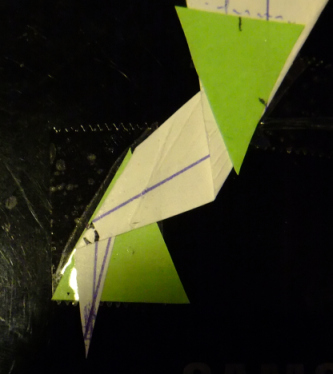
Reducing the W1 / W3 base to 1.6 cm !!
Project worked from July 17 to August 14, 2013
 IMPORTANT
INSTRUCTIONS on how to use the W3BPS
IMPORTANT
INSTRUCTIONS on how to use the W3BPS
added
2018/07/05 (English & Français !)
A nicely working prototype has been designed and assembled !
Download PDF V3.2 with more improved instructions and pictures & magnifying glass added !
( Jan 23,2013)
Testing the Pearl TV glasses setup in line !
I arranged the glasses planted in a cardbox to have an idea of FOV, quality and 3D positions.
Please copy the 3D images with a right click then paste into SPM to accomodate your kind of 3D vision.
Here are the 2D (one lens) results :
(note when fully mounted for 3D the resulting base is expected to be
about 2cm).
Under a small halogen light, the quality is fine and the FOV is a
bit better than with the 1 mirror setup...
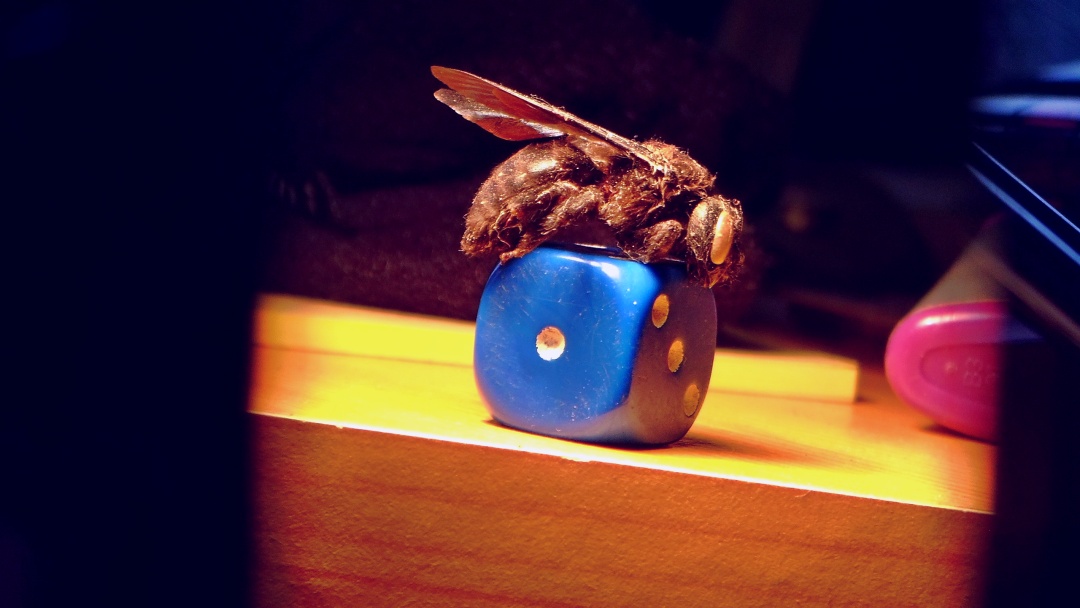
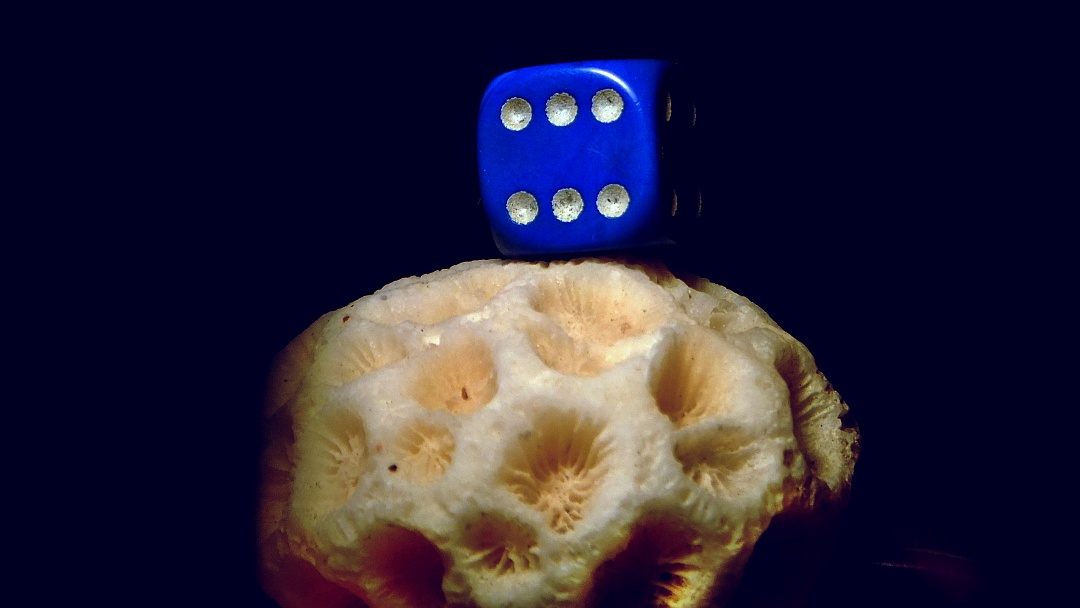
In both above pictures the subject is at
about 20 cm from the W3 in 2D mode, macro & full zoom
The dice has 13 mm sides.
( Jan 15,2013)
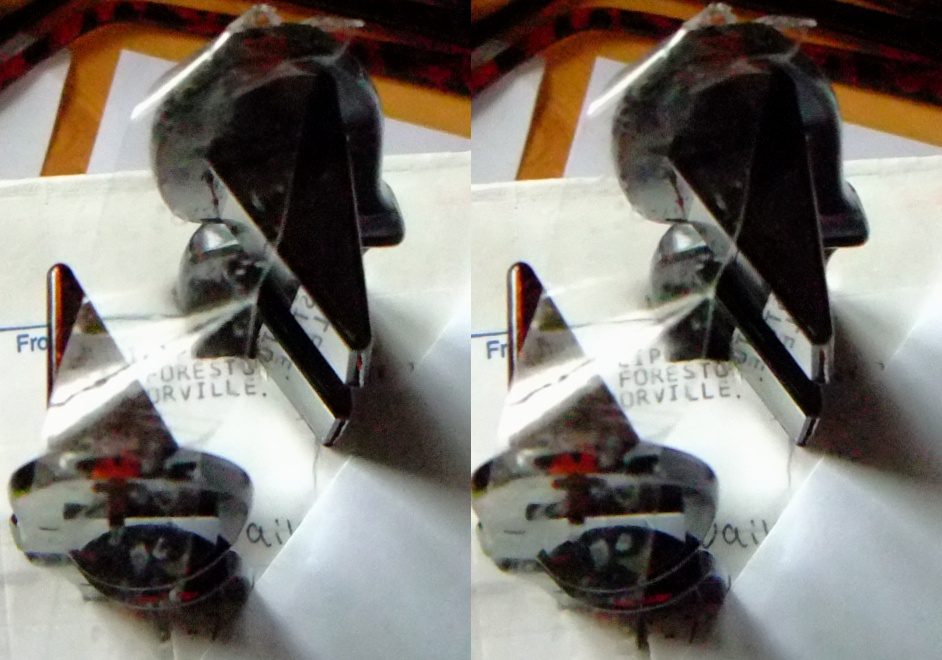
Arrival of the two pairs of Pearl TV glasses !
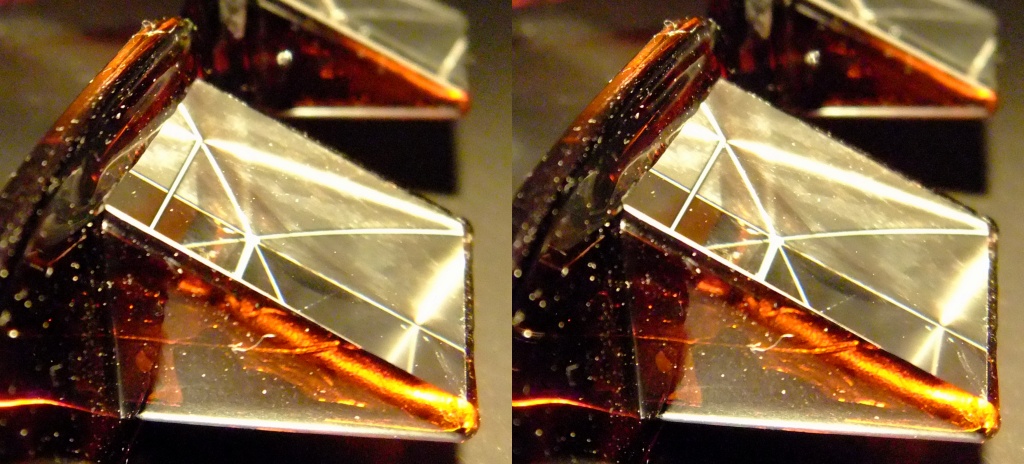
Here are detailled vues of the "Zavarius" prism ...
Please copy the 3D images with a right click then paste into SPM to accomodate your kind of 3D vision.


Below you can see that they are 90°-60°-30°
angle prisms !
I will have to change the graphics below (Jan 7) ...

The prisms are approximately like this :
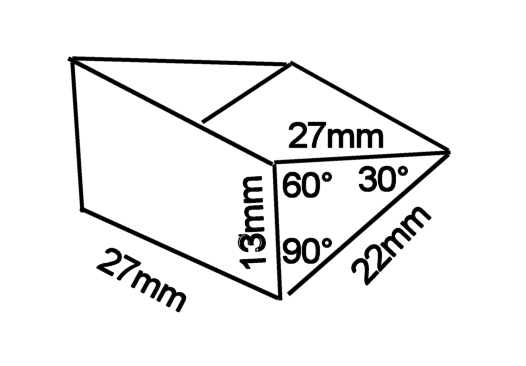
The path showing the 60° deviation is shown here
Preliminary tests show that I can separate
the prims from 1 to maybe 4 cm and still have a good view with my eyes.
I could probably
make a mount to have a variable base ...
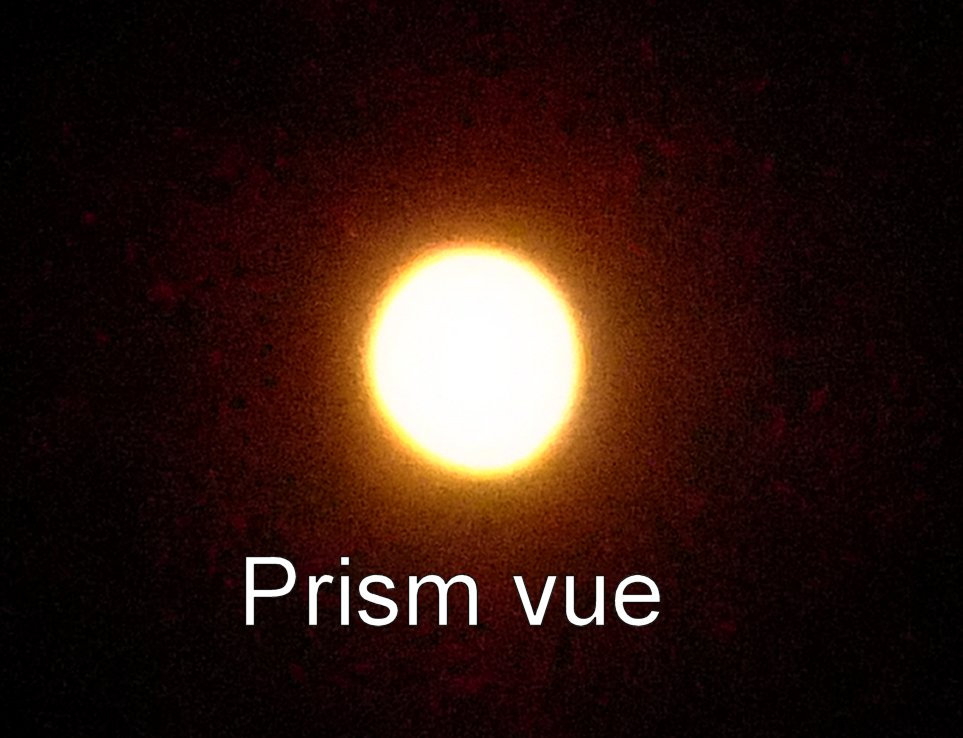
I am also surprised to see that absolutely no color fringes are present when one or even two prims are in line !
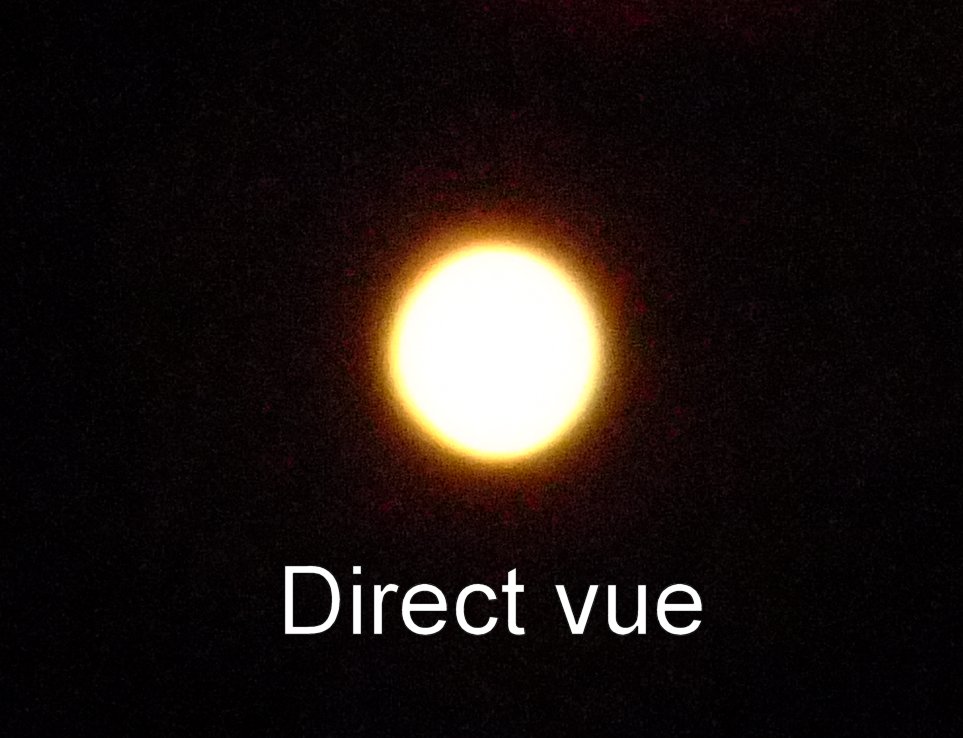
Here vue through one prism of a bulb
(Jan 07,2013)
note : below with the 60-60-60° prism I
expected but which are not the one for thoses glasses. Just left here in
case it may be useful ...
I think it is possible to use
4x 60° (Note : finally same idea with
90-30-60°) prisms
from cheap bedroom TV glasses to make an adapter to reduce the base of
the W3 & W1 ...
The half side of the prisms being about 1 cm, that would be the new
base of the camera.
Optimal distance for the subject would then
be 30 cm
But as I have used, without parallax problems if no far away backgrounds,
the nominal W3 at a minimal distance of 110 cm if I set the zoom to full,
I can expect
to
be able
to take subjects (of less than 5 cm size) in video or stills at
about 15 cm !
This would be great when cha-cha with the A3D setting is not possible as in the case of living animals !
V2.jpg)
The unused side of the prisms will be painted black.
I will post more as soon as I have received and tested this DIY !
Preliminary paper FOV Test [suggested by David (microfungy), with thanks !]
of course the exact size of the prism is
not yet known ...
It seems that about 1/3 - 1/2 of the W3 (full zoom) FOV could be reached.
Above picture shows it possible (total width <= 3.75 cm) to fit in front
of the camera.
IMPORTANT INSTRUCTIONS on how to use the
W3BPS
***********************************************
ENGLISH
- W3 wheel positions to use are all except A3D & A2D
- Never use internal flash
- Zoom should be set at maximum
- Using AutoFocus is Ok but object should be centered on screen. With the half press maintained you can the move it around the frame
- Min distance of object should be 1.6 x 30 cm giving ~50 cm (30 x base) !
- Nevertheless, shooting macros it is
genrally permitted to use 1/15 instead of 1/30. Moreover as a good zoom
is used it is possible to try also 15-25 cm distance !
But do also other shots farther !!
- just before taking the picture, check with one eye then the next alternatively
that the object is not cut on both halves of the W3 screen !
- For the picture at minimum distance, placed below the french text, the W3 was placed at 10 cm of the object, aborted trial of autofocus but keeping half pressed moving the W3BPS slowly backwards / forwards to get best visual focus on screen, verification of margins and shoot !
FRANCAIS
- les positions à utiliser sur le W3BPS sont TOUTES sauf A3D* et A2D !!!!
- Le zoom doit être au Max !
- Mise au point auto Ok en centrant bien l'objet sur l'écran. Avec une demi pression, on peut alors ensuite modifier le cadrage !
- Ne jamais utiliser le flash interne du W3 !
- La distance du premier plan doit être en standard plus grande ou égale à 1.6 x 30 cm soit 50 cm (30 fois la base) !
Note d'usagers en macro : on se permet souvent le 1/15 soit ici une distance mini de 25 cm. De plus comme on est avec un bon zoom on peut faire des essais plus près disons de 15 à 25 cm à condition de ne pas se contenter uniquement d'eux car on risque une mauvaise surprise (parallaxe trop important, fusion impossible) ...
Ci-joint un exemple le plus près possible ! A 15 cm** ! MPO d'origine non traité / Alignement SPM / Alignement SPM réduit à 1080p de hauteur.
- Juste avant la prise de vue fermer un œil puis l'autre alternativement pour vérifier que l'objet n'est pas coupé en vision oeil D et oeil G sur l'écran 3D du W3.
* A3D c'est du chacha ... n'utilise que l'objectif gauche !!
** Pour cette photo le W3BPS a été rapproché à 10
cm de l'objet, demi pression pour mise une point qui ne se fait pas (trop
près avec le Zoom maxi) ... recul lent avec tâtonnement du W3
pour avoir la meilleure MaP en visuel à l'écran, vérification
du centrage et déclenchement !