P-Dark and PDarkGradient Technic
I always have to battle against light
pollution. I tried some image processing to depollute in different ways.
At the beginning I just limited the exposure time ...
but now I have an improved method which gives me satisfaction * with images
taken with my Canon EOS 300D moded camera , here it is !
(* In this procedure we will use Paint Shop Pro but Photoshop could be used too: see capital letters in red !)
| Below is the result of a Canon RAW mode, 300mm
lens, 5 min exposure at 1600 ISO (reduced to 1024 pixels) of Holmes
comet (20071107). I cannot use such "long" exposure from my home. I was deep inside the Rambouillet forest at about 30Km.. |
 |
| Below is the classical 5 min dark frame... at first glance it is obvious that this will not improve very much our picture (except near the right border ) ! |
 |
| Below is the result of the substraction of the classical dark frame.. not much difference in most of the frame ! (A) |
 |
| Below, after duplication of the image (B), I select a small zone (1), far enough from the comet and with no stars for no interference, copy it in the clipboard and paste it as a new image (2). Then I apply a strong gaussian filter (3) and I take the RGB color in the center with the pipette (4). I put this color as background color. |
1  2
2  3
3  4
4  |
| (C) Now I make
a copy of the whole image, select all, delete .... The size is identical to the signal image but the content is replaced with the background color : this is the basic PDark ! |
 |
| (D) Below is the result of the substraction of the PDark frame... Now anyone can see the difference ! |
 |
Of course you can process the PDark before substraction at will. Here is the result of eliminating its blue component. The PDark is yellower ! Another useful thing I do most of the time is to do a 0.80-0.90 gamma to suppress less light from the original image. |
 |
| Here is now the result of the substraction ... more blue is preserved in the comet image ! |
 |
Another example this time a DSO, with a previous version of the technic (no rectangle selection, no gaussian, just choose a single point) can be seen below.
Notes for Photoshop :
(A)
Image / Apply image / darkframe, substraction, opacity 100 %
(B) right click on image / duplicate calc twice / first as new files C1 then
as new file C2.
Then select a zone in C2, crop, apply max gaussian, take center color with
the pipette, invert front and background colors. Close C2.
(C) select all in C1, delete : all frame filled with background color. You
have your PDark !
(D) click on comete image, then Image / Apply image / C1, substraction, opacity
100 %
.
The P-Dark technic (older version of this page)
I am in a location near Paris where the sky is much
polluted especially by high pressure sodium bulbs !
Exposures with my Canon 300D, recently defiltered, are limited to
about 1 min with an IDAS 2" LPS filter !
The results are orangey brown images with allmost no signal visible.On
the other side, a standard dark frame of 1 min is allmost black !
There is allmost no use to substract it from the object image !
Then I have designed a new method from the one
I discribed for the comets in this site also.
I shall work with what I call a pdark
(for pollution dark). It seems that the more pollution the
more the pdark gives good results :)
Below are the succession of images created by
this new method with the example of NGC7000 in Cygnus (100/500 Skywatcher
refractor mounted in // on a LX 200 12") :
 |
| We start with the usual image (#1) registered with Registax V4 save in TIFF mode. I work with PSP (but any other would do). The circle shows where I choose a pixel (outside of where the nebula is) with the pipette to create the pdark. I move the mouse slowly around the choosen pixel to check that the values are all but constant... Then I click to get the RGB values. I make a duplicate of image #1, exchange the values of the background and forecast colors, hit Ctrl-A to select all the image, then Del. The result is the image below... which is the pdark ! |
 |
| Then in PSP I use the Image/Arithmatical function, set to substract (image #1 - pdark). The result is image #3 below. |
 |
| I then square the image #3 (arithmatical multiply : #3 x #3 with a division factor set to 2 (could be a little different with your images)... something is coming out ! |
 |
and finally I apply a gamma 2.3 to get the
final image below ! ... but you got the point ! Happy light pollution fighting !
|
 |
PDarkGradient
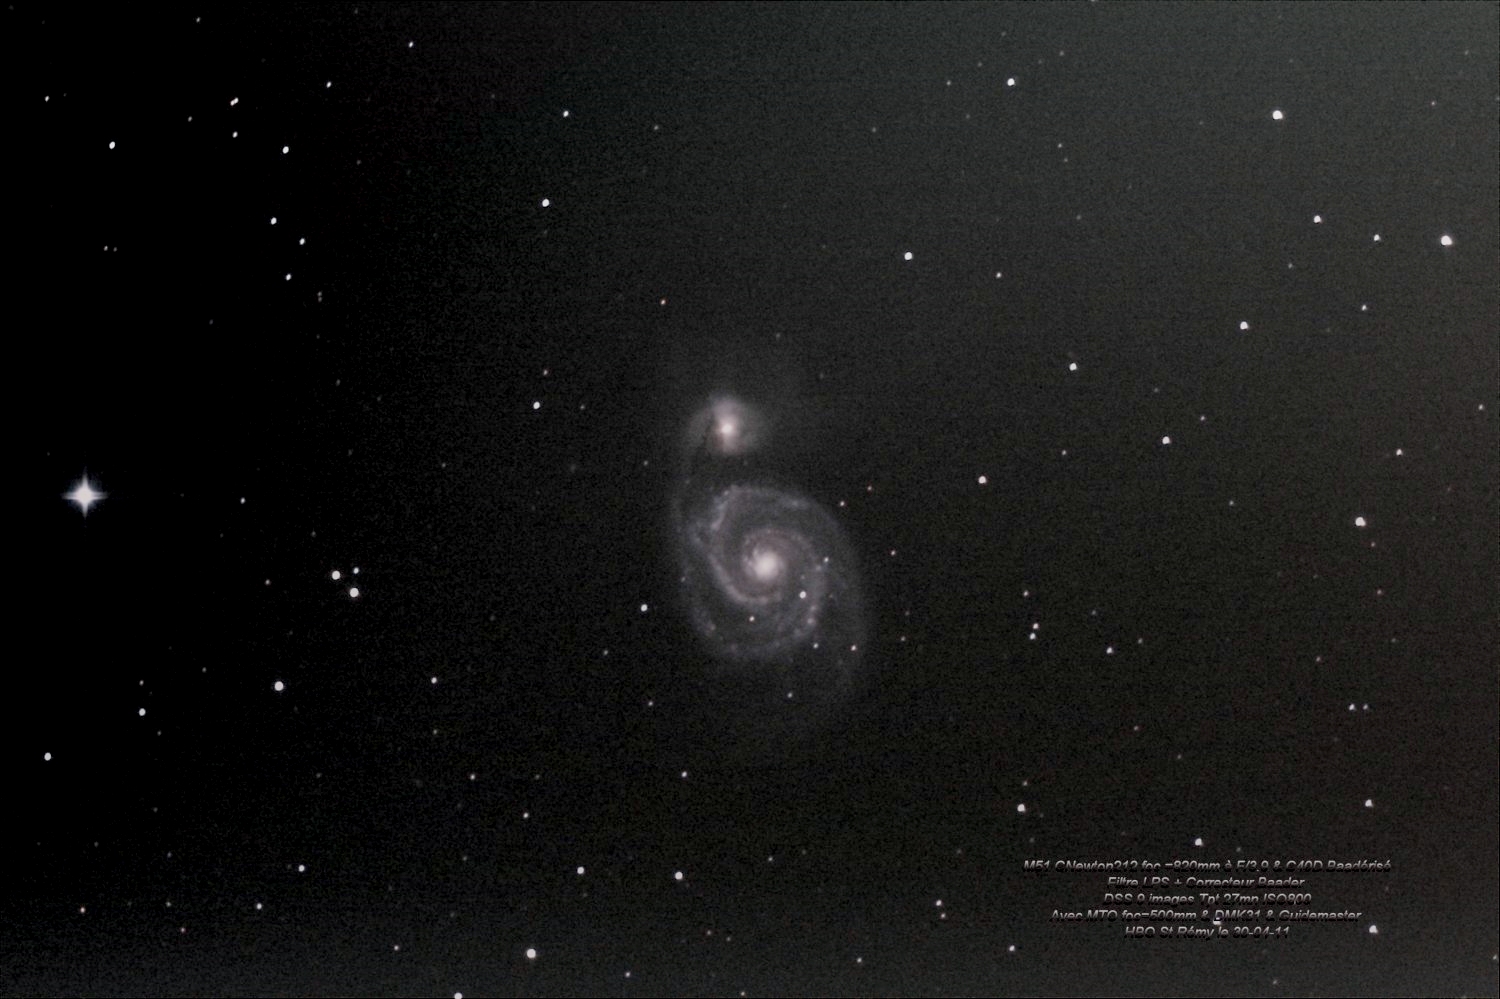
This is a variant I developped to process H. Bovy's M51 / M65+ images ...


As you can see there is a strong vertical
gradient of luminosity.
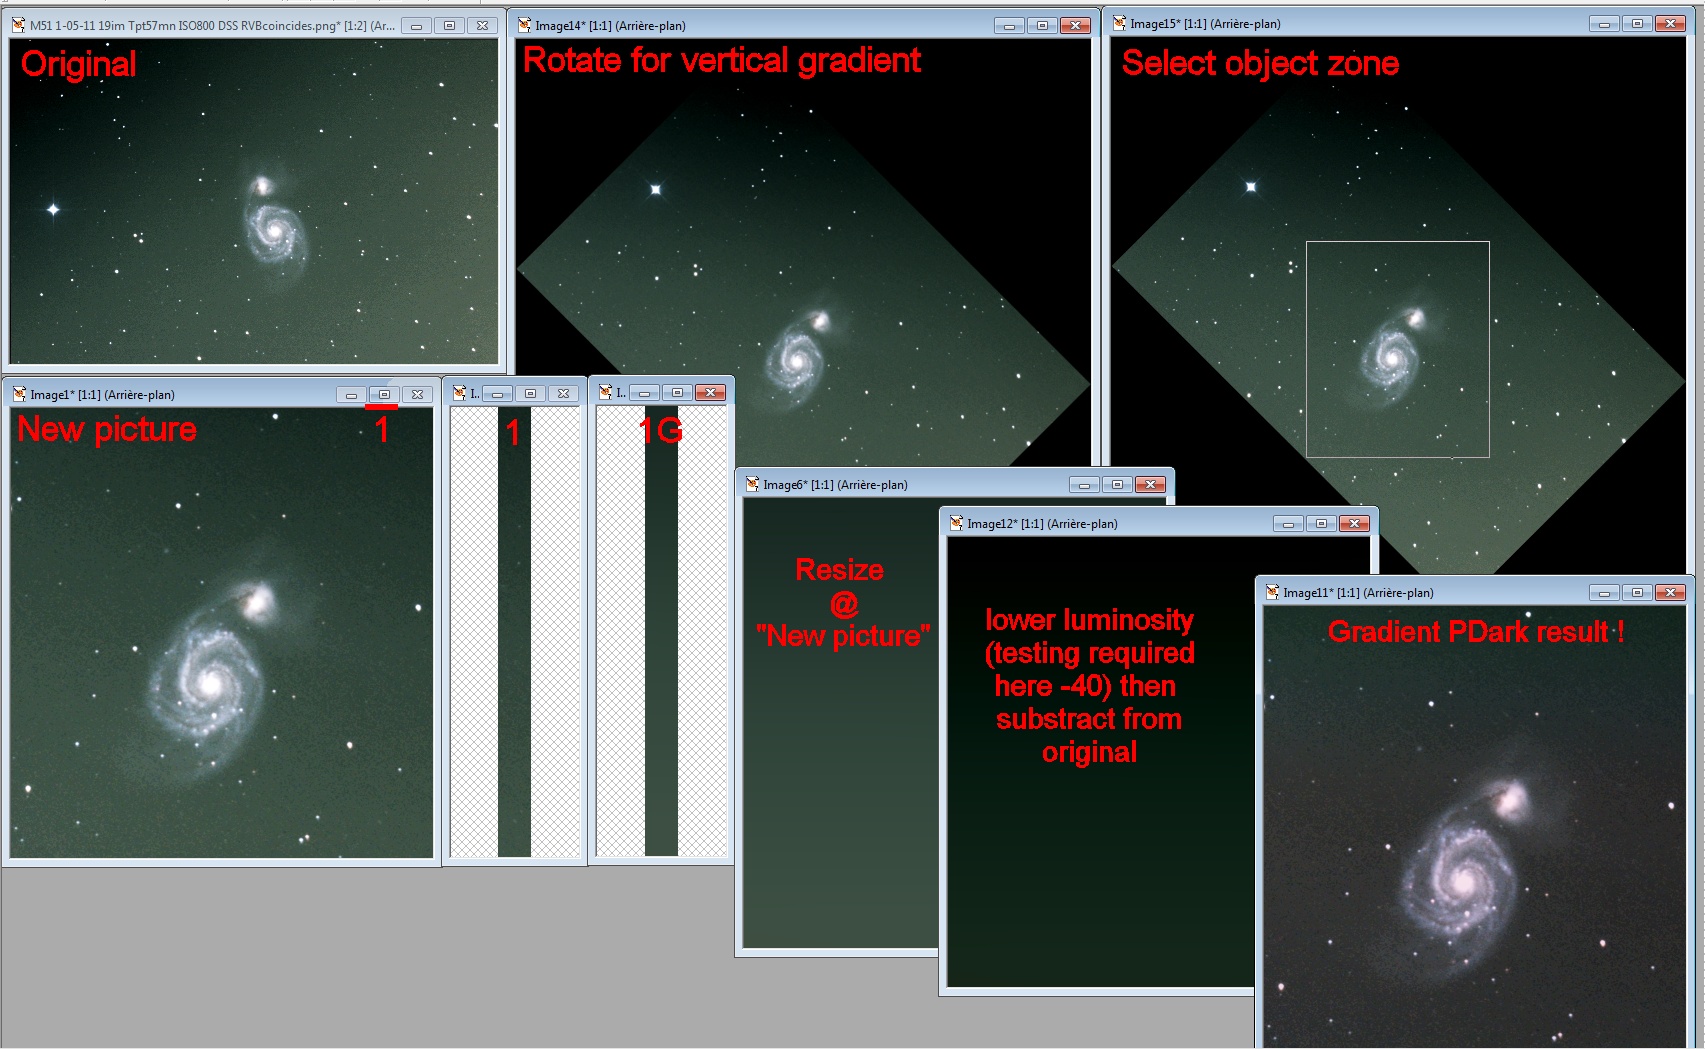
Then I made a copy of the image and cut a vertical stripe.
Then I applied a very strong gaussian (100 in PSP !) to the striped image
to get the result on the right.
Next I expanded the stripe to the full size of the original image and substracted it from the original to get this really improved result (also did gamma 1.3)...
Same processing for the Leo trio (M65, M66 & NGC3628) ...

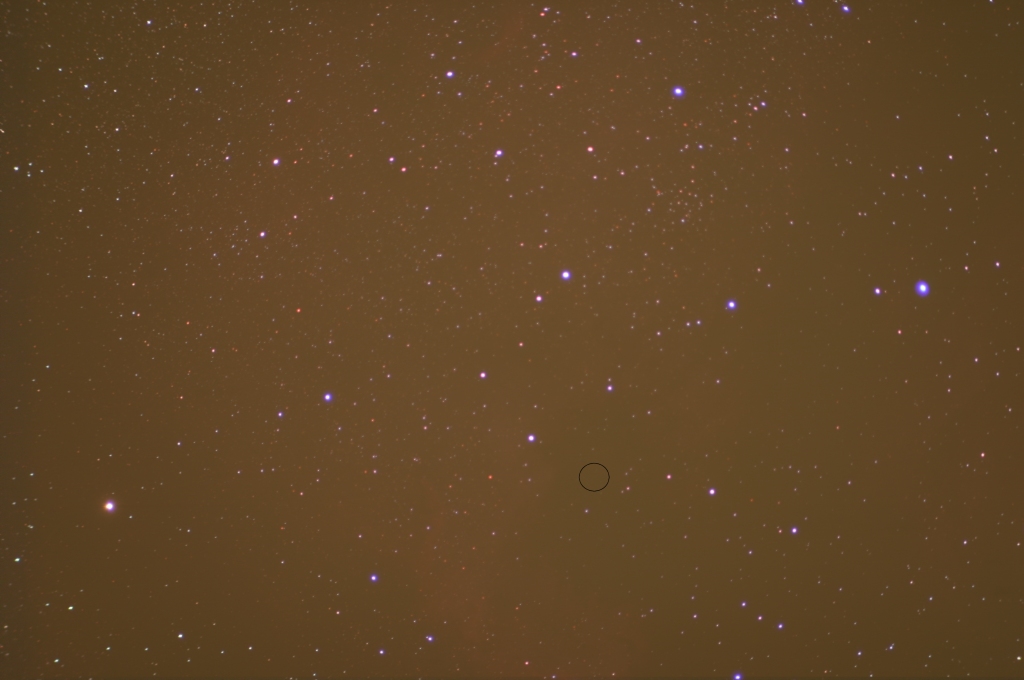
In case the gradient is not vertical, as here ... a way to still do the PDark ...
1 = zone chosen for vertical selection (only
very faint stars)
1G = result after applying strong gaussian