Reminder
: text and pictures - as the totality of my web site, BTW - are Copyright
S. Weiller - 2019
and should not appear anywhere else prior written authorization from sweiller@free.fr
!!
UPDATE 2019/10/28
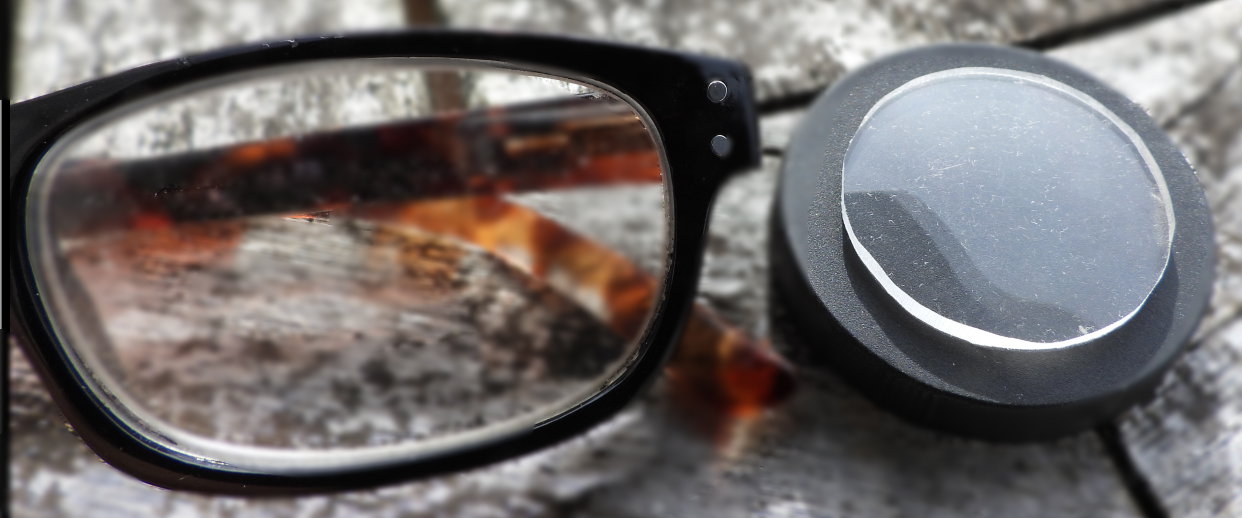
Improvement for people using glasses !
ITo see correctly I need to
put glasses so with the system below my sight was not very good !
Today I added a 1.5D lens !
I started with very cheap plastic glasses,
I extracted one lens by force,
I put it on the scope and marked the circle,
I used with care a rotative electric dry
sharpening system (medium coarse grit stone) to progressiveley make the round
lens
I placed it in (eye side of the scope) and locked it with black nail polish all around !
IT'S GREAT !

2019/09/17
The Story ...
After months of zooming and
de-zooming to make BIFs captures - with little success - I wanted to improve
the experience !
Came to my mind the simple idea to associate the P1000 always set at high zoom
(1000
to
3000 mm) to a wide angle aiming device.
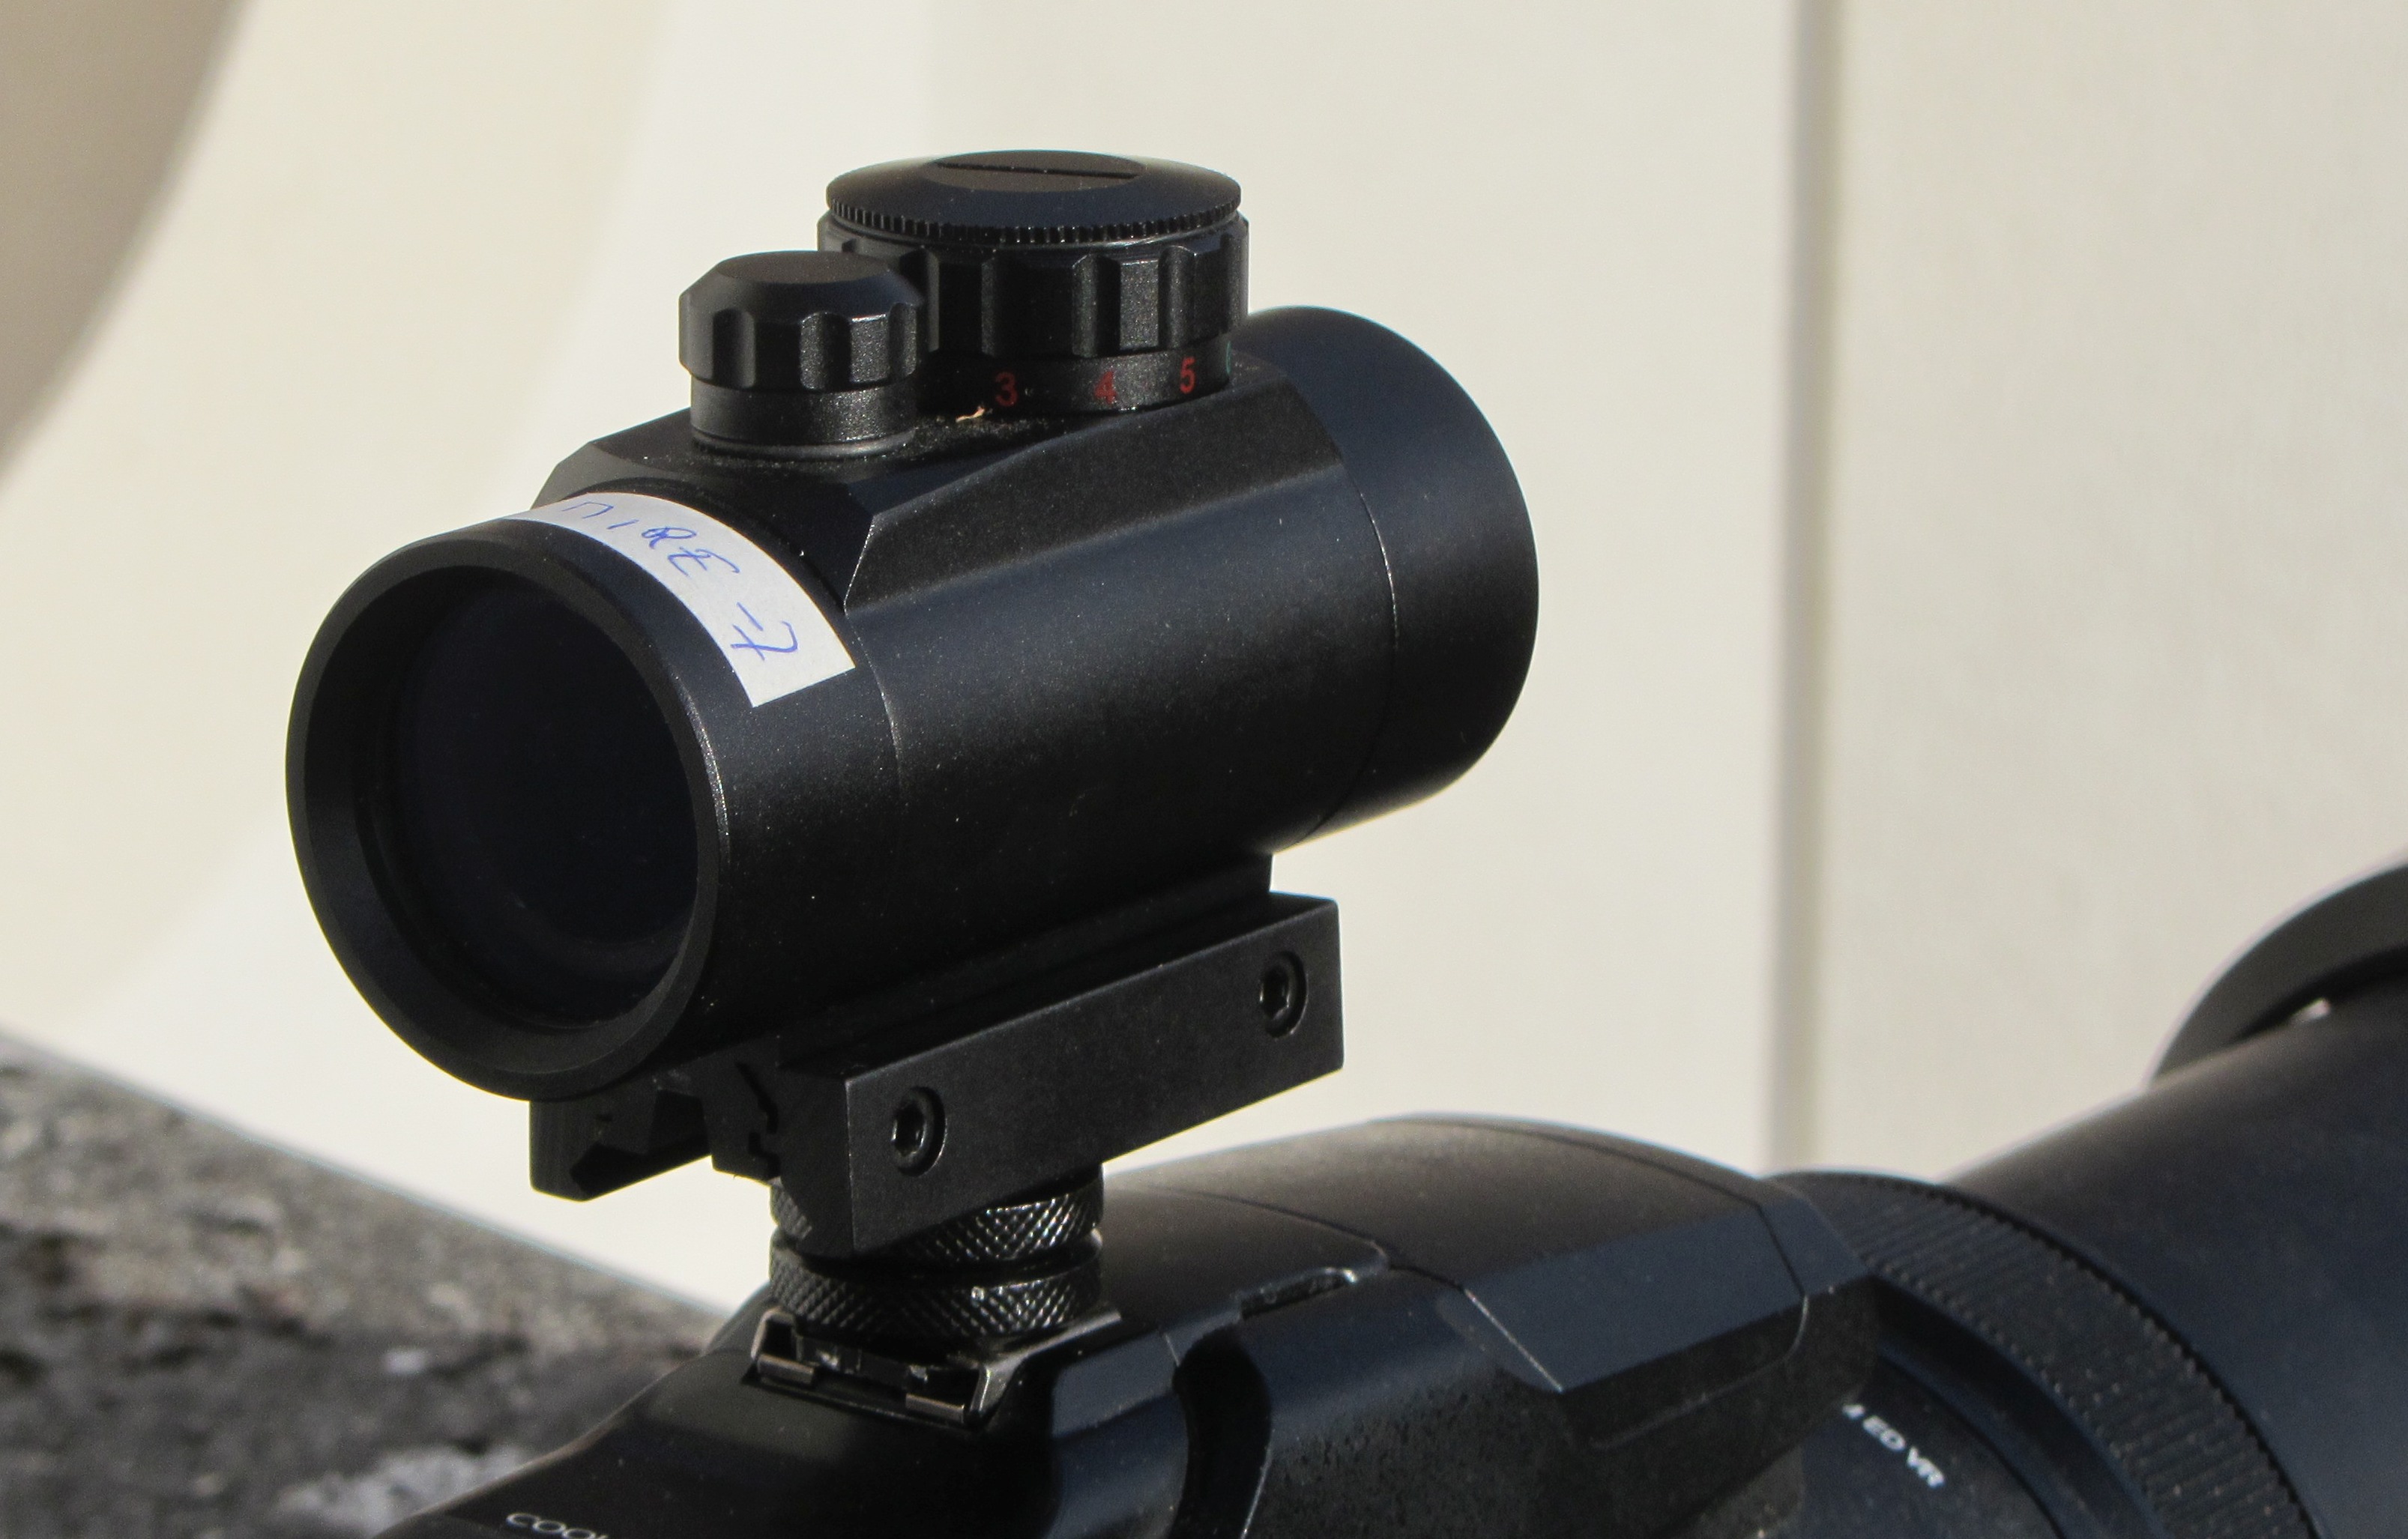
I found a rather cheap
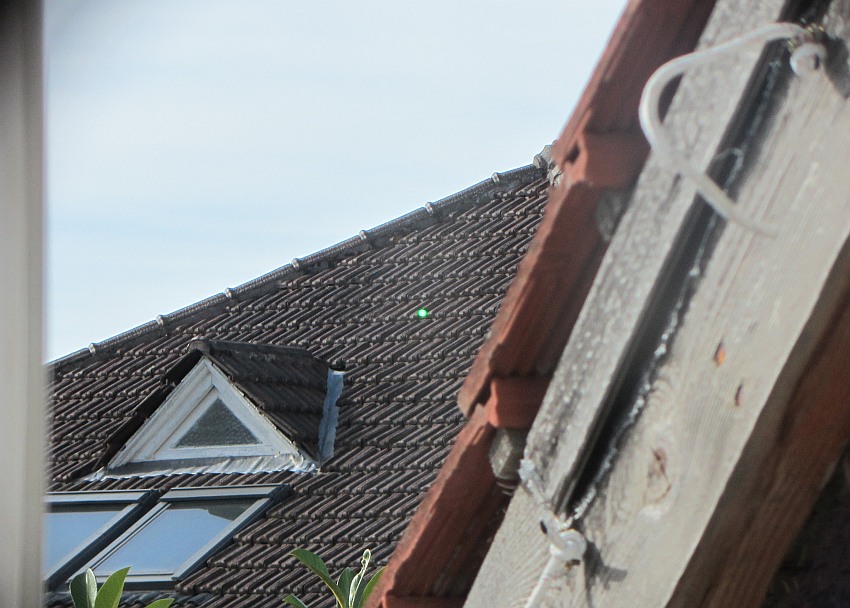
green spot prism scope ** used on guns.
Bought it. Satisfied ! The tiny bright green spot is clearly visible in bright
daylight !
After working a lot to get a proper inter-ocular distance I can tell you that
it is really great to boost your chances of following fast flying birds
!
Unfortunately, most birds at my location only fly near
sunrise or sunset when sunlight is not strong.
Moreover, they are small, generally dark and moving at up to 45° /
second
then generally visible for just a few seconds !!
During waiting periods of bird
watching, I train on high planes and because they are visually rather slow
compared with small
birds
they are a very easy target as you can see HERE...
My next target in a couple of days will be the ISS
at the usual 3000 mm FL !!
All done !
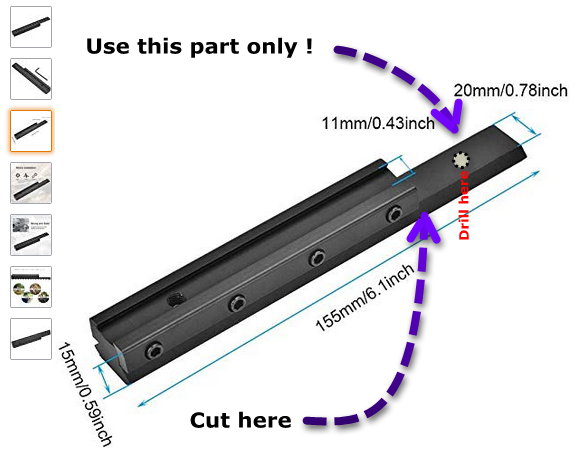
The thin end piece of a Picatinny
Gun Rail Extension (see below 1) *** is cut, drilled and a Kodak photo
thread is made in the middle.
It is first tighten into the rail (2) holding the scope.
Then the Hot Shoe Adapter (3) (eventually cut 5 mm in length) is tighten
on
one
side
to the camera flash mount (bottom of picture) and on the other side to the drilled
piece
(1)
in order to
align
as nicely as possible the scope with the lens of the camera.
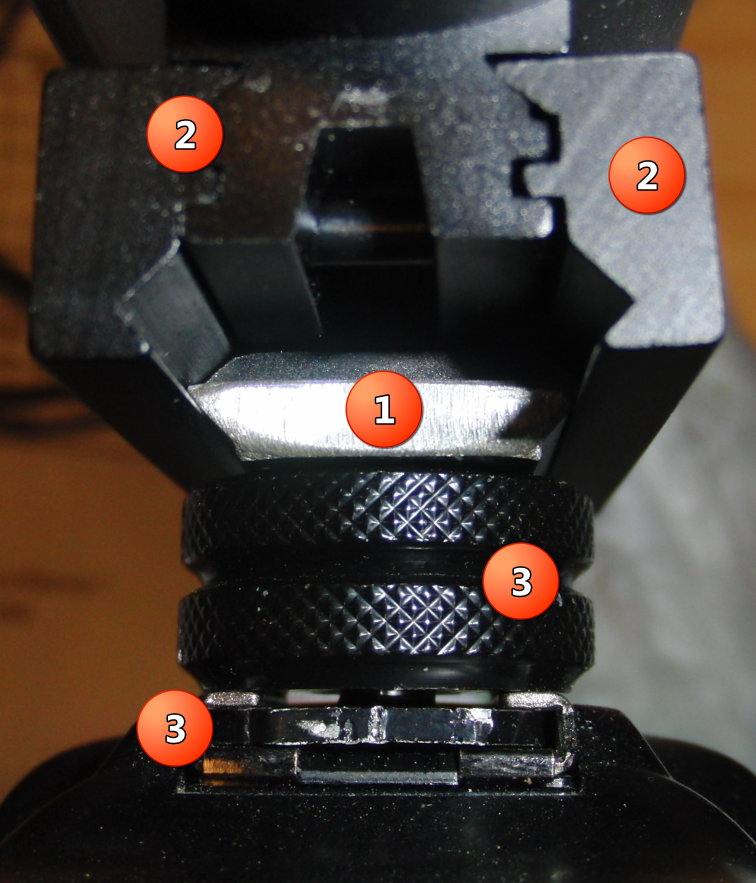
Distance between the 2 sights here is about 65 mm (near interocular distance).
To buy ...
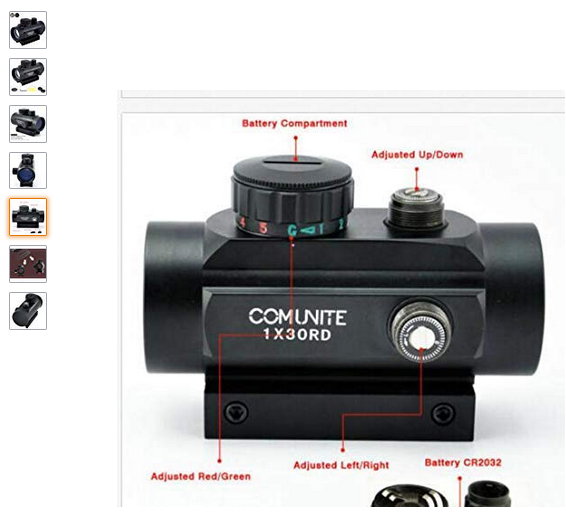
** Look for :
Comunite Rifle Scope 1x30mm Red Dot Sight with 20mm/11mm Weaver Picatinny Mount
Rails
by Comunite
*** Look
for :
Alomejor Scope Base Mount Rail Mount 111mm to 20mm Dovetail Picatinny
and
ChromLives Camera Hot Shoe Mount Hot Shoe Adapter
w/ 1/4'' -20 Tripod Screw Flash Shoe Mount Monitor Bracket (2 Pack)
by ChromLives

USAGE
For best aiming results, the
camera has to be tilted vertically (not
like here !) so you can see in the scope with wide FOV and
in the camera with high zoom at the same time.
When aiming with the green dot you will a some moment see the bird
in the camera. Now quickly concentrate on camera vision.
If the bird is
lost just look again
quickly in the
large FOV scope and you can move very fast to it !
Note : Turn Off all indications on the P1000 electronic viewfinder !
When the dot is not very bright it is time to change the CR2032 battery.
Enjoy happy birding !